Introduction
In the era of real-time computer vision, YOLO (You Only Look Once) has revolutionized object detection with its speed, accuracy, and end-to-end simplicity. From surveillance systems to self-driving cars, YOLO models are at the heart of many vision applications today. Whether you’re a machine learning engineer, a hobbyist, or part of an enterprise AI team, getting YOLO to perform optimally on your custom dataset is both a science and an art.
In this comprehensive guide, we’ll share the top 5 essential tips for training YOLO models, backed by practical insights, real-world examples, and code snippets that help you fine-tune your training process.
Tip 1: Curate and Structure Your Dataset for Success
1.1 Labeling Quality Matters More Than Quantity
- ✅ Use tight bounding boxes — make sure your labels align precisely with the object edges.
- ✅ Avoid label noise — incorrect classes or inconsistent labels confuse your model.
- ❌ Don’t overlabel — avoid drawing boxes for background objects or ambiguous items.
Recommended tools: LabelImg, Roboflow Annotate, CVAT.
1.2 Maintain Class Balance
- Resample underrepresented classes.
- Use weighted loss functions (YOLOv8 supports
cls_weight).
- Augment minority class images more aggressively.
1.3 Follow the Right Folder Structure
/dataset/
├── images/
│   ├── train/
│   ├── val/
├── labels/
│   ├── train/
│   ├── val/
Each label file should follow this format:
<class_id> <x_center> <y_center> <width> <height>
All values are normalized between 0 and 1.

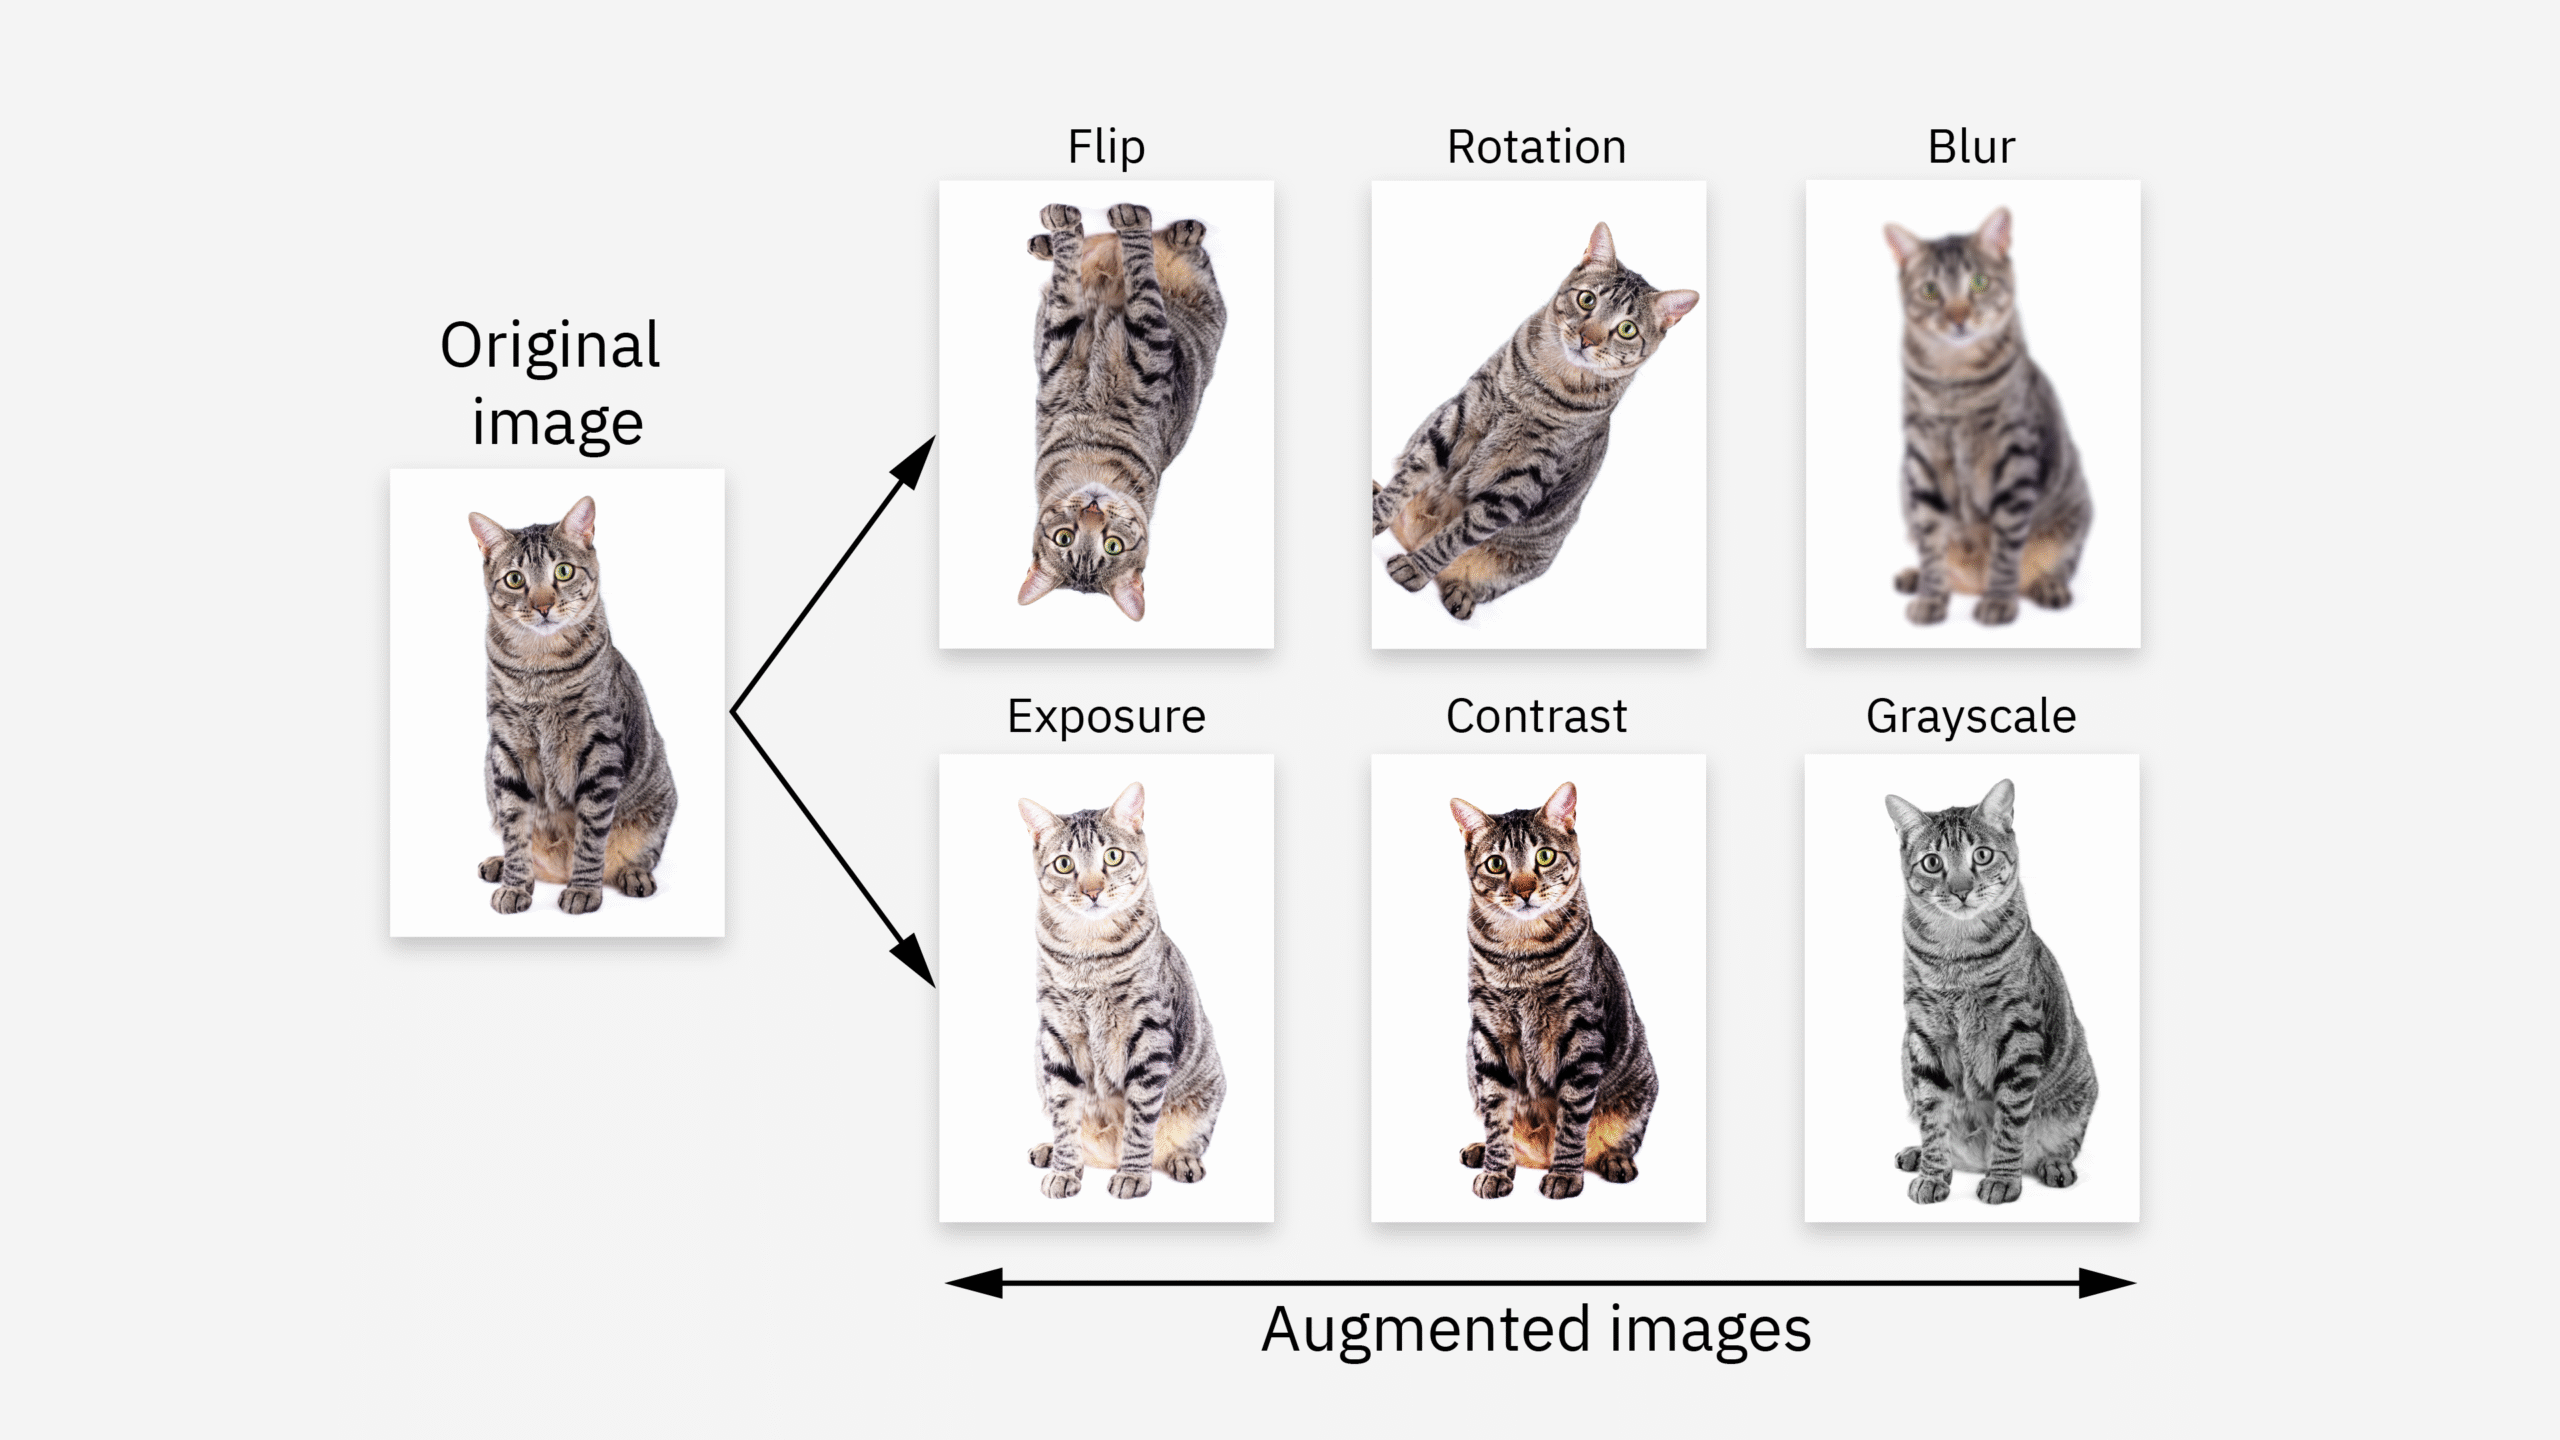
Tip 2: Master the Art of Data Augmentation
The goal isn’t more data — it’s better variation.
2.1 Use Built-in YOLO Augmentations
- Mosaic augmentation
- HSV color-space shift
- Rotation and translation
- Random scaling and cropping
- MixUp (in YOLOv5)
Sample configuration (YOLOv5
data/hyp.scratch.yaml):
hsv_h: 0.015
hsv_s: 0.7
hsv_v: 0.4
degrees: 0.0
translate: 0.1
scale: 0.5
flipud: 0.0
fliplr: 0.5
2.2 Custom Augmentation with Albumentations
import albumentations as A
transform = A.Compose([
    A.HorizontalFlip(p=0.5),
    A.RandomBrightnessContrast(p=0.2),
    A.Cutout(num_holes=8, max_h_size=16, max_w_size=16, p=0.3),
])
Tip 3: Optimize Hyperparameters Like a Pro
3.1 Learning Rate is King
- YOLOv5: 0.01 (default)
- YOLOv8: 0.001 to 0.01 depending on batch size/optimizer
💡 Tip: Use Cosine Decay or One Cycle LR for smoother convergence.
3.2 Batch Size and Image Resolution
- Batch Size: Max your GPU can handle.
- Image Size: 640×640 standard, 416×416 for speed, 1024×1024 for detail.
3.3 Use YOLO’s Hyperparameter Evolution
python train.py --evolve 300 --data coco.yaml --weights yolov5s.pt

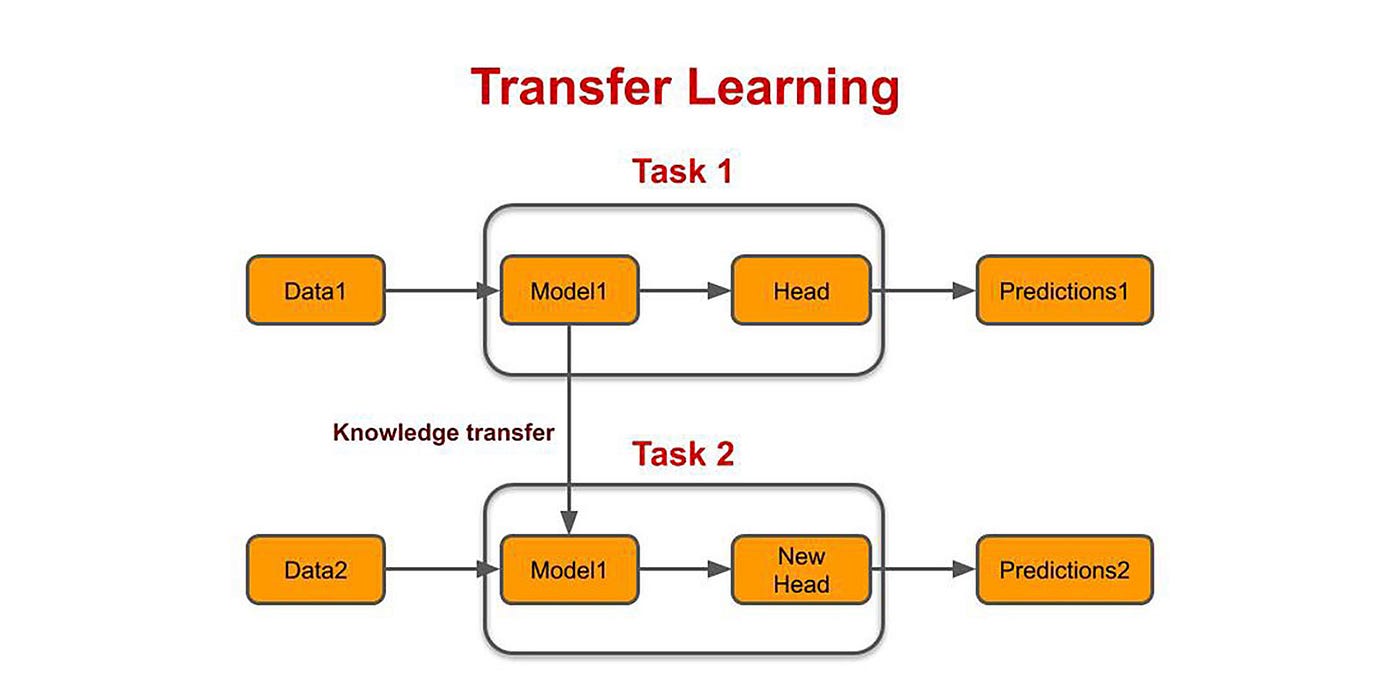
Tip 4: Leverage Transfer Learning and Pretrained Models
4.1 Start with Pretrained Weights
- YOLOv5: yolov5s.pt, yolov5m.pt, yolov5l.pt, yolov5x.pt
- YOLOv8: yolov8n.pt, yolov8s.pt, yolov8m.pt, yolov8l.pt
yolo task=detect mode=train model=yolov8s.pt data=data.yaml epochs=100 imgsz=640
4.2 Freeze Lower Layers (Fine-Tuning)
yolo task=detect mode=train model=yolov8s.pt data=data.yaml epochs=50 freeze=10
Tip 5: Monitor, Evaluate, and Iterate Relentlessly
5.1 Key Metrics to Track
- mAP (mean Average Precision)
- Precision & Recall
- Loss curves: box loss, obj loss, cls loss
5.2 Visualize Predictions
yolo mode=val model=best.pt data=data.yaml save=True
5.3 Use TensorBoard or ClearML
tensorboard --logdir runs/train
Other tools: ClearML, Weights & Biases, CometML
5.4 Validate on Real-World Data
Always test on your real deployment conditions — lighting, angles, camera quality, etc.
Bonus Tips 🔥
Final Thoughts
Training YOLO is a process that blends good data, thoughtful configuration, and iterative learning. While the default settings may give you decent results, the real magic happens when you:
- Understand your data
- Customize your augmentation and training strategy
- Continuously evaluate and refine
By applying these five tips, you’ll not only improve your YOLO model’s performance but also accelerate your development workflow with confidence.
Further Resources