
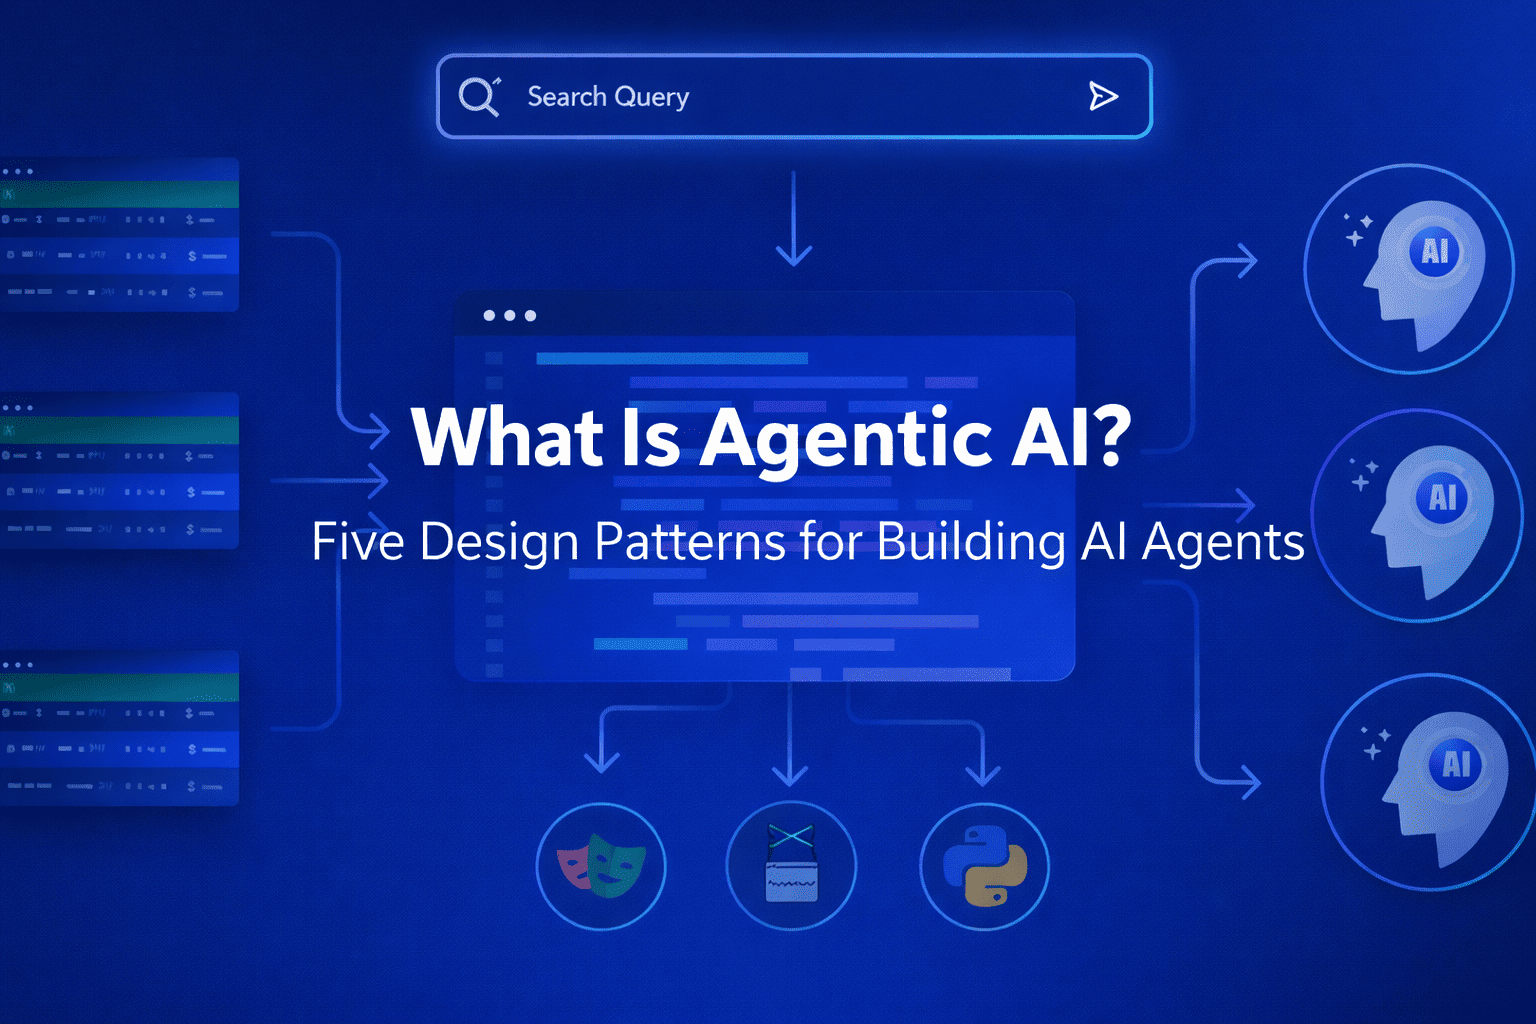
Introduction Artificial intelligence is undergoing a major shift. For the past few years, large language models (LLMs) have primarily acted as responsive tools — systems that generate answers when prompted. But a new paradigm is emerging: Agentic AI. Instead of simply responding, AI systems are now able to plan, decide, act, and iterate toward goals. These systems are called AI agents, and they represent one of the most important transitions in modern software design. In this article, we’ll explain what Agentic AI is, why it matters, and the five core design patterns that turn LLMs into capable AI agents. What Is Agentic AI? Agentic AI refers to AI systems that can independently pursue objectives by combining reasoning, memory, tools, and decision-making workflows. Unlike traditional chat-based AI, an agentic system can: Understand a goal instead of a single prompt Break tasks into steps Choose actions dynamically Use external tools and data Evaluate results and improve outcomes In simple terms: A chatbot answers questions. An AI agent completes tasks. Agentic AI transforms LLMs from passive generators into active problem-solvers. Why Agentic AI Matters The shift toward agent-based systems unlocks entirely new capabilities: Automated research assistants Software development agents Autonomous customer support workflows Data analysis pipelines Personal productivity copilots Organizations are moving from prompt engineering to system design, where success depends less on clever prompts and more on architecture. That architecture is built using repeatable design patterns. The Five Design Patterns for Agentic AI 1. The Planner–Executor Pattern Core idea: Separate thinking from doing. The agent first creates a plan, then executes actions step by step. How it works: Interpret user goal Generate task plan Execute each step Adjust based on results Why it matters Reduces hallucinations Improves reliability Enables long-running tasks Example use cases Research agents Coding assistants Multi-step automation workflows 2. Tool-Using Agent Pattern Core idea: LLMs become powerful when connected to tools. Instead of relying only on internal knowledge, agents call external systems such as: APIs databases search engines calculators internal company services Agent loop: Reason about next action Select tool Execute tool call Interpret output Key insight:LLMs provide reasoning; tools provide precision. This pattern turns AI from a text generator into a functional system operator. 3. Memory-Augmented Agent Pattern Core idea: Agents need memory to improve over time. Without memory, every interaction resets context. Agentic systems introduce structured memory layers: Short-term memory: conversation context Long-term memory: stored knowledge Working memory: active task state Benefits Personalization continuity across sessions improved decision-making Memory enables agents to behave less like chat sessions and more like collaborators. 4. Reflection and Self-Critique Pattern Core idea: Agents improve by evaluating their own outputs. After completing an action, the agent asks: Did this achieve the goal? What errors occurred? Should I retry differently? This creates an iterative improvement loop. Typical workflow Generate solution Critique result Revise approach Produce improved output Why it matters Higher accuracy fewer logical failures better reasoning chains Reflection transforms single-pass AI into adaptive intelligence. 5. Multi-Agent Collaboration Pattern Core idea: Multiple specialized agents outperform one general agent. Instead of a single system doing everything, responsibilities are divided: Planner agent Research agent Writer agent Reviewer agent Executor agent Agents communicate and coordinate toward shared goals. Advantages specialization improves quality scalable workflows modular architecture This mirrors how human teams operate — and often produces more reliable outcomes. How These Patterns Work Together Most real-world agentic systems combine several patterns: Capability Design Pattern Task decomposition Planner–Executor External actions Tool Use Learning over time Memory Quality improvement Reflection Scalability Multi-Agent Systems Agentic AI is not one technique — it’s a composition of coordinated behaviors. Agentic AI Architecture (Conceptual Stack) A typical AI agent system includes: LLM reasoning layer – understanding and planning Orchestration layer – workflow control Tool layer – APIs and integrations Memory layer – persistent knowledge Evaluation loop – reflection and monitoring Designing agents is therefore closer to systems engineering than prompt writing. Challenges of Agentic AI Despite its promise, Agentic AI introduces new complexities: Latency from multi-step reasoning cost management for long workflows safety and permission boundaries evaluation and debugging difficulties orchestration reliability Successful implementations focus on constrained autonomy rather than unlimited freedom. Risks: Trust Without Ground Truth The normalization of synthetic authority introduces several societal risks: Erosion of shared reality — communities may inhabit different perceived truths. Manipulation at scale — political and commercial persuasion becomes cheaper and more targeted. Institutional distrust — genuine sources struggle to distinguish themselves from synthetic competitors. Cognitive fatigue — constant skepticism exhausts audiences, leading to disengagement or blind acceptance. The danger is not that people believe everything, but that they stop believing anything reliably. Best Practices for Building AI Agents Start with narrow goals Add tools gradually Log agent decisions Implement guardrails early Separate planning from execution Measure outcomes, not responses The most effective agents are designed systems, not improvisations. The Future of Agentic AI Agentic AI is rapidly becoming the foundation of next-generation software. We are moving toward systems that: manage workflows autonomously collaborate with humans continuously adapt through feedback loops operate across digital environments Just as web apps defined the 2000s and mobile apps defined the 2010s, AI agents may define the next era of computing. Conclusion Agentic AI represents a fundamental evolution in artificial intelligence — shifting from tools that respond to prompts toward systems that pursue goals. The transformation happens through architecture, not magic. By applying five key design patterns: Planner–Executor Tool Use Memory Augmentation Reflection Multi-Agent Collaboration developers can turn LLMs into reliable, capable AI agents. The future of AI isn’t just smarter models — it’s smarter systems. FAQ What is Agentic AI in simple terms? Agentic AI refers to AI systems that can independently plan and execute tasks to achieve goals rather than only responding to prompts. How is Agentic AI different from chatbots? Chatbots generate responses. Agentic AI systems take actions, use tools, remember context, and iteratively work toward outcomes. Do AI agents replace humans? No. Most agentic systems are designed to augment human workflows by automating repetitive
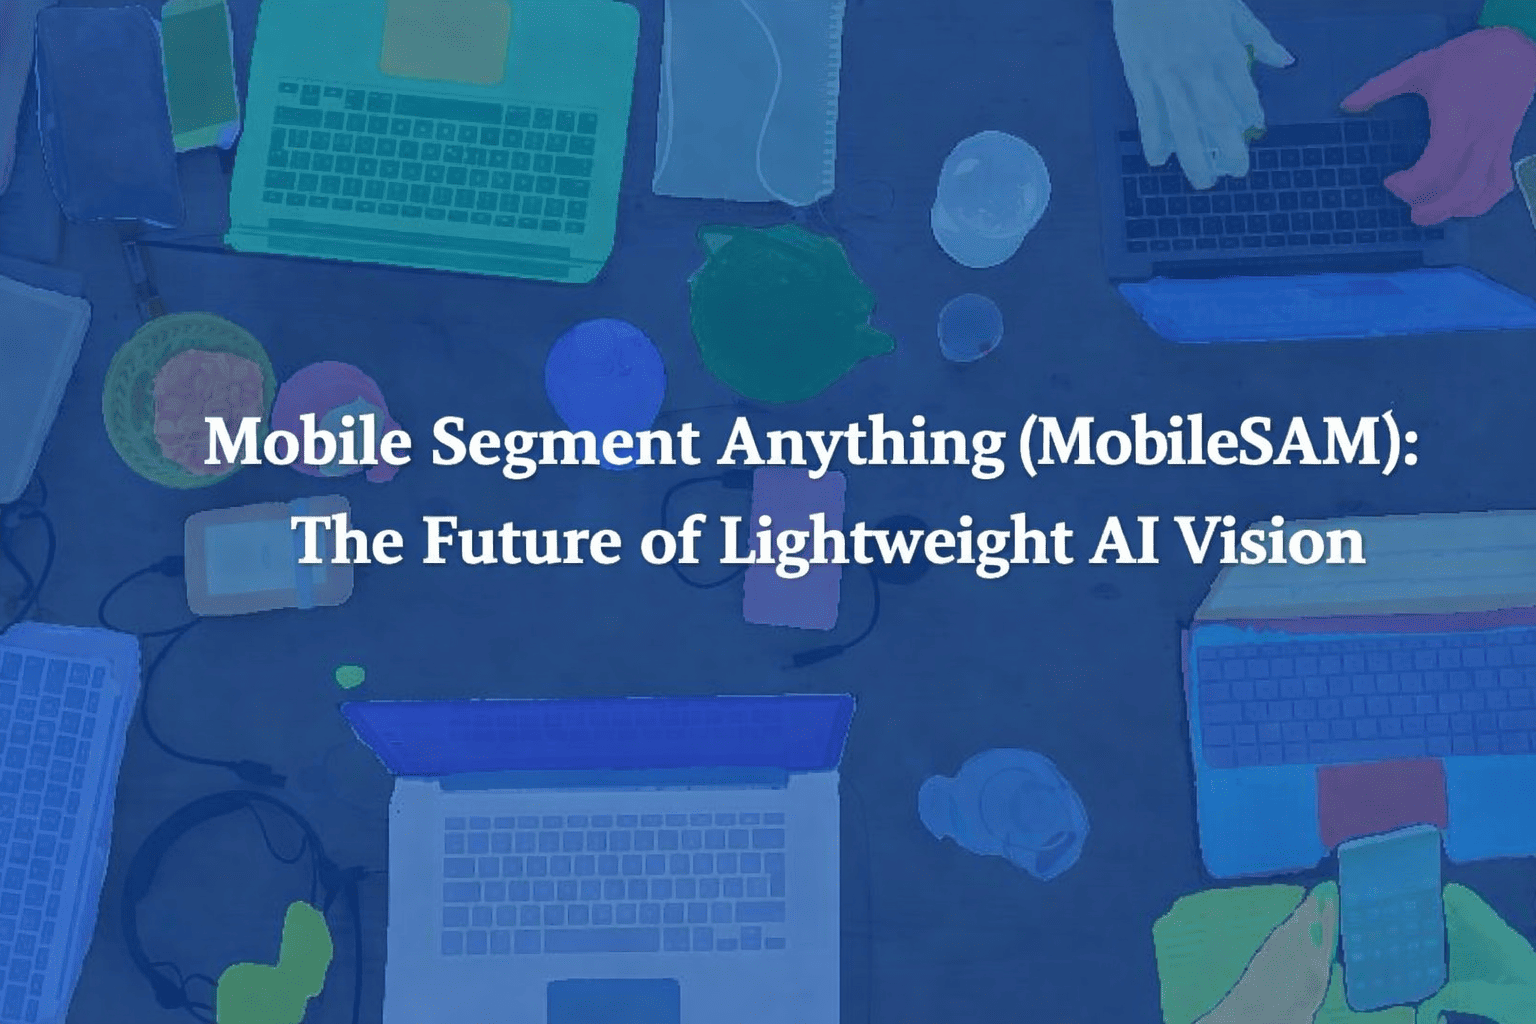
Introduction Computer vision has come a long way, but high-performing AI models often come with a catch: they’re huge, resource-hungry, and impractical for mobile devices. The original Segment Anything Model (SAM) broke ground in universal image segmentation, yet its massive size made real-time, on-device use nearly impossible. In this series, we explore Mobile Segment Anything (MobileSAM) — a lightweight, mobile-ready adaptation that brings powerful segmentation to smartphones, embedded systems, and edge devices. MobileSAM keeps the precision and flexibility of SAM while dramatically reducing computational demands, opening the door to real-time AI applications wherever you need them. From mobile photo editing to augmented reality, robotics, and even healthcare imaging, MobileSAM makes it possible to run sophisticated image segmentation directly on-device — fast, efficient, and without sacrificing privacy. In short, it’s AI vision, untethered. What Is MobileSAM? MobileSAM is a lightweight adaptation of the Segment Anything Model (SAM) designed to perform image segmentation with significantly reduced computational requirements. Image segmentation is the process of identifying and separating objects within an image at the pixel level. Instead of simply detecting objects, segmentation precisely outlines them. MobileSAM achieves this while maintaining strong accuracy but drastically improving speed and efficiency. Key Idea Replace heavy components of SAM with a compact encoder architecture while keeping the powerful segmentation capability intact. The result: Faster inference Lower memory usage Mobile compatibility Near-SAM performance Why MobileSAM Was Created The original SAM model introduced a universal segmentation approach capable of understanding almost any visual object. However, it required: High GPU power Large memory capacity Server-level hardware This limited real-world deployment. MobileSAM was developed to solve three major challenges: Edge deployment Real-time performance Energy efficiency Now segmentation can run directly on devices instead of relying on cloud processing. How MobileSAM Works MobileSAM keeps SAM’s general pipeline but optimizes the architecture. 1. Lightweight Image Encoder The main improvement lies in replacing SAM’s large Vision Transformer encoder with a smaller, mobile-friendly backbone. Benefits: Reduced parameters Faster computation Lower latency 2. Prompt-Based Segmentation Like SAM, MobileSAM accepts prompts such as: Points Bounding boxes Masks Text guidance (via integrations) Users can interactively guide segmentation results. 3. Efficient Mask Decoder The decoder remains similar to SAM, preserving segmentation quality while benefiting from the faster encoder. Key Features of MobileSAM Real-Time Performance MobileSAM runs significantly faster than traditional segmentation models, enabling live applications. Mobile & Edge Ready Designed for: Smartphones AR/VR devices Robotics systems IoT cameras General-Purpose Segmentation Works across diverse categories without retraining. Energy Efficient Lower computational demand means better battery performance. MobileSAM vs Original SAM Feature SAM MobileSAM Model Size Very Large Lightweight Hardware Needs GPU Required Mobile Compatible Speed Moderate Very Fast Edge Deployment Limited Excellent Accuracy Extremely High Near-Comparable MobileSAM trades a small amount of accuracy for massive gains in usability and speed. Real-World Use Cases 1. Mobile Photo Editing Apps Instant background removal and object selection directly on-device. 2. Augmented Reality (AR) Real-time object segmentation improves immersive AR experiences. 3. Robotics Robots can understand environments locally without cloud dependence. 4. Autonomous Systems Drones and smart vehicles benefit from lightweight perception models. 5. Healthcare Imaging Portable medical devices can analyze visuals offline. Advantages of On-Device Segmentation Running segmentation locally provides major benefits: Privacy protection (no cloud upload) Reduced latency Offline functionality Lower operational cost Improved responsiveness MobileSAM aligns perfectly with the growing trend of edge AI computing. Performance and Efficiency MobileSAM achieves: Dramatically reduced model size Faster inference speeds Comparable segmentation quality to SAM Lower power consumption This balance makes it practical for commercial applications where performance and efficiency must coexist. Developer Benefits Developers adopting MobileSAM gain: Easier deployment pipelines Reduced infrastructure costs Cross-platform compatibility Real-time interaction capabilities It integrates well with frameworks such as: PyTorch ONNX Mobile AI runtimes Challenges and Limitations Despite its advantages, MobileSAM still has trade-offs: Slight accuracy reduction compared to full SAM Performance varies across hardware Complex scenes may still require larger models However, ongoing optimization continues to close these gaps. The Future of Mobile Vision Models MobileSAM represents a broader shift toward efficient AI models rather than simply larger ones. Future trends include: Smaller multimodal models On-device generative AI Privacy-first AI applications Real-time AI assistants powered locally Lightweight models like MobileSAM are expected to become foundational for next-generation applications. Conclusion Mobile Segment Anything (MobileSAM) marks an important evolution in computer vision. By bringing powerful segmentation capabilities to mobile and edge devices, it removes one of the biggest barriers to deploying advanced AI in everyday environments. As AI moves from cloud servers to personal devices, MobileSAM demonstrates how efficiency, speed, and accessibility can coexist with high-quality performance. For developers, startups, and researchers, MobileSAM isn’t just an optimization — it’s a gateway to scalable, real-world AI vision systems. Visit Our Data Annotation Service Visit Now Lorem ipsum dolor sit amet, consectetur adipiscing elit. Ut elit tellus, luctus nec ullamcorper mattis, pulvinar dapibus leo.
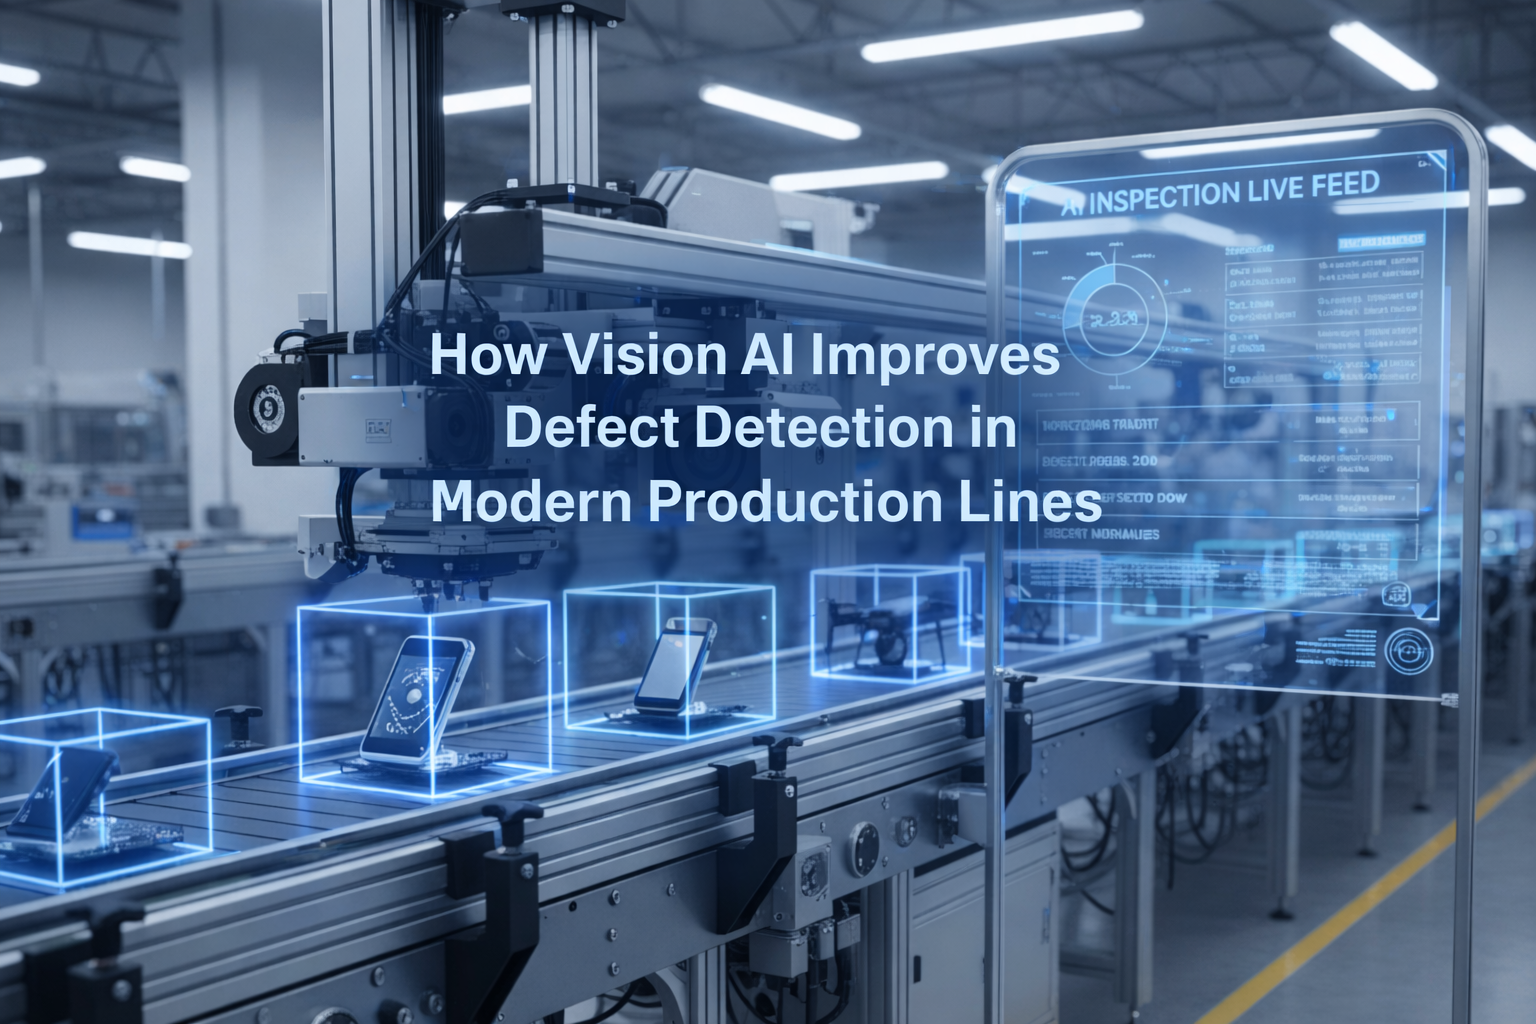
Introduction Manufacturing has entered an era where precision, speed, and consistency define competitiveness. Traditional quality inspection methods — largely dependent on human operators or rule-based machine vision — struggle to keep pace with increasingly complex production environments. As product customization grows and tolerances become tighter, manufacturers require smarter inspection systems capable of detecting defects accurately and continuously. This is where Vision AI is reshaping industrial quality control. Vision AI combines computer vision with artificial intelligence and deep learning to enable machines to interpret visual data similarly to human perception — but with far greater speed, scalability, and consistency. Modern production lines are now leveraging Vision AI to detect defects earlier, reduce waste, and maintain superior product quality. This article explores how Vision AI improves defect detection, the technologies behind it, real-world applications, implementation strategies, and future trends shaping intelligent manufacturing. What Is Vision AI in Manufacturing? Vision AI refers to AI-powered systems that analyze images or video streams captured by cameras installed along production lines. Unlike traditional inspection systems that rely on predefined rules, Vision AI learns patterns directly from data. A typical Vision AI inspection system includes: Industrial cameras and sensors Edge or cloud computing infrastructure Deep learning models Image processing pipelines Real-time analytics dashboards These systems continuously analyze products during manufacturing to identify anomalies, defects, or deviations from quality standards. Limitations of Traditional Defect Detection Methods Before understanding Vision AI’s advantages, it’s important to recognize why conventional inspection methods fall short. 1. Human Inspection Challenges Manual inspection introduces variability due to: Fatigue and attention loss Subjective judgment Limited inspection speed Difficulty detecting micro-defects Even experienced inspectors may miss subtle inconsistencies after long shifts. 2. Rule-Based Machine Vision Constraints Earlier machine vision systems relied on fixed algorithms such as edge detection or threshold rules. These systems struggle when: Lighting conditions change Products vary slightly Surfaces are reflective or textured Defects are unpredictable As production complexity increases, rule-based systems become costly to maintain and recalibrate. How Vision AI Enhances Defect Detection 1. Learning-Based Defect Recognition Vision AI models learn directly from labeled images of both good and defective products. Instead of hard-coded rules, neural networks identify patterns automatically. Key advantages: Detects subtle defects invisible to rule-based systems Adapts to product variations Improves accuracy over time Examples of detectable defects include: Surface scratches Cracks and dents Assembly misalignment Missing components Color inconsistencies 2. Real-Time Inspection at Production Speed Vision AI systems operate continuously and analyze thousands of items per minute without slowing production. Benefits include: Instant rejection of faulty products Reduced downstream rework Early detection of process issues Real-time feedback allows manufacturers to correct problems before large batches are affected. 3. Higher Accuracy and Consistency Unlike human inspection, AI systems do not suffer from fatigue or inconsistency. Vision AI delivers: Stable inspection performance 24/7 Repeatable decision-making Reduced false positives and false negatives Consistency is particularly critical in industries with strict compliance requirements. 4. Detection of Previously Invisible Defects Deep learning models identify complex visual patterns that traditional systems cannot define mathematically. For example: Microfractures in metal surfaces Texture irregularities in fabrics Cosmetic defects in consumer electronics Subtle contamination in food production This capability dramatically increases quality assurance levels. 5. Continuous Improvement Through Data Vision AI systems improve as more inspection data is collected. Over time they can: Learn new defect types Adapt to product design changes Optimize detection thresholds automatically Production lines effectively become self-improving quality ecosystems. Core Technologies Behind Vision AI Inspection Deep Learning Models Convolutional Neural Networks (CNNs) analyze spatial features within images, enabling accurate visual classification and anomaly detection. Edge AI Computing Processing inspection data directly on factory-floor devices reduces latency and ensures real-time decision-making. Anomaly Detection Algorithms These models learn what “normal” products look like and flag deviations without needing examples of every possible defect. High-Speed Imaging Systems Modern cameras capture high-resolution images synchronized with conveyor movement for precise inspection. Key Industry Applications Automotive Manufacturing Paint defect detection Weld inspection Component assembly validation Electronics Production PCB inspection Solder joint analysis Missing micro-components detection Food and Beverage Packaging integrity checks Contamination detection Label verification Pharmaceutical Manufacturing Pill shape verification Packaging compliance inspection Serialization validation Textile and Materials Fabric flaw detection Pattern consistency monitoring Operational Benefits for Manufacturers 1. Reduced Production Waste Early detection prevents defective batches from progressing through costly stages. 2. Lower Operational Costs Automation reduces reliance on manual inspection teams while increasing throughput. 3. Improved Product Quality Higher detection accuracy leads to fewer customer complaints and returns. 4. Data-Driven Process Optimization Inspection data reveals recurring production issues and bottlenecks. 5. Regulatory Compliance Automated inspection logs provide traceability required in regulated industries. Risks: Trust Without Ground Truth The normalization of synthetic authority introduces several societal risks: Erosion of shared reality — communities may inhabit different perceived truths. Manipulation at scale — political and commercial persuasion becomes cheaper and more targeted. Institutional distrust — genuine sources struggle to distinguish themselves from synthetic competitors. Cognitive fatigue — constant skepticism exhausts audiences, leading to disengagement or blind acceptance. The danger is not that people believe everything, but that they stop believing anything reliably. Implementation Strategy for Vision AI Successful deployment requires more than installing cameras. Step 1: Define Inspection Goals Identify: Critical defect types Quality thresholds Production constraints Step 2: Data Collection Gather diverse image datasets including: Normal products Known defects Environmental variations Step 3: Model Training and Validation Train AI models using representative datasets and validate accuracy before deployment. Step 4: Integrate with Production Systems Connect Vision AI outputs to: PLC systems Robotic reject mechanisms Manufacturing execution systems (MES) Step 5: Continuous Monitoring Regularly retrain models as products or processes evolve. Challenges and Considerations While powerful, Vision AI implementation involves challenges: Initial data preparation effort Hardware and infrastructure investment Change management within teams Model maintenance and retraining However, long-term ROI typically outweighs these initial hurdles. Future Trends in Vision AI for Manufacturing Self-Learning Inspection Systems AI models that automatically adapt to new defects without manual labeling. Multimodal Inspection Combining visual data with thermal, 3D, or hyperspectral sensors. Edge

Introduction For most of modern history, images carried an implicit promise: they were evidence. A photograph suggested that something happened — that a moment existed in front of a lens at a specific time and place. Even when manipulated, images were rooted in reality. That assumption is now dissolving. Generative AI systems can produce hyper-realistic images, videos, voices, and documents without any real-world event behind them. These outputs do more than imitate reality — they compete with it, often appearing more polished, persuasive, and emotionally precise than authentic media. We are entering an era defined by synthetic authority: the phenomenon in which AI-generated content gains credibility, influence, and persuasive power independent of truth or origin. This shift is not merely technological. It is epistemological — changing how humans decide what to trust. What Is Synthetic Authority? Synthetic authority refers to the perceived legitimacy granted to content that is artificially generated rather than witnessed or recorded. Traditionally, authority emerged from identifiable sources: Institutions (news organizations, universities) Experts and professionals Physical evidence Eyewitness documentation Generative AI disrupts all four simultaneously. An AI image can now: Look professionally photographed Mimic journalistic aesthetics Align perfectly with audience expectations Spread faster than verification processes Authority is no longer derived from origin but from appearance. In other words: credibility is shifting from provenance to plausibility. Why AI-Generated Content Feels Trustworthy Synthetic authority works because generative AI exploits deeply human cognitive shortcuts. 1. Visual Bias Humans are evolutionarily wired to trust visual information. Seeing has long been equated with believing. High-fidelity AI images activate this instinct automatically. 2. Aesthetic Professionalism AI systems learn from millions of polished media examples. The result is content that looks statistically “ideal” — balanced lighting, compelling composition, emotionally optimized expressions. Ironically, synthetic images can look more real than reality. 3. Speed Over Verification Information ecosystems reward immediacy. AI can produce content instantly, while fact-checking requires time. The first image seen often becomes the mental anchor for belief. 4. Algorithmic Amplification Social platforms prioritize engagement. Emotionally resonant AI-generated content often outperforms authentic but mundane reality. Authority emerges through visibility. From Photography to Promptography Photography once required physical presence: a camera, a subject, a moment. Generative AI introduces what some call promptography — the creation of images through language rather than observation. The creator no longer captures reality; they describe it. This transformation changes the role of authorship: Traditional Media Generative Media Witnessing Specifying Recording Generating Editing reality Simulating reality Evidence-based Probability-based The shift raises a fundamental question:If an image looks authentic but has no historical origin, what kind of truth does it hold? The Collapse of Visual Verification For decades, society relied on visual documentation to verify events — journalism, legal evidence, historical archives. Generative AI challenges that foundation in three major ways: 1. Infinite Fabrication Anyone can create convincing imagery of events that never occurred. 2. Plausible Deniability Real images can now be dismissed as fake simply because convincing fakes exist — a phenomenon sometimes called the “liar’s dividend.” 3. Contextual Manipulation AI allows subtle alterations that reshape narratives without obvious signs of editing. The result is not just misinformation, but epistemic instability — uncertainty about whether truth can be visually confirmed at all. Synthetic Authority Beyond Images While images receive the most attention, synthetic authority extends across media forms: AI-generated voices delivering convincing speeches Synthetic experts writing authoritative articles AI avatars presenting news broadcasts Automatically generated research summaries Authority becomes performative rather than experiential. The marker of legitimacy shifts from who created it to how convincingly it performs expertise. Economic Incentives Driving Synthetic Authority The rise of synthetic authority is accelerated by powerful incentives: Efficiency Organizations can produce unlimited content without traditional production costs. Personalization AI content can be tailored precisely to audience psychology, increasing persuasion. Scalability Synthetic media operates at a scale no human workforce can match. Attention Economics In a crowded information environment, emotionally optimized synthetic content wins attention — and attention translates into revenue. Synthetic authority is therefore not an accident; it is economically reinforced. Risks: Trust Without Ground Truth The normalization of synthetic authority introduces several societal risks: Erosion of shared reality — communities may inhabit different perceived truths. Manipulation at scale — political and commercial persuasion becomes cheaper and more targeted. Institutional distrust — genuine sources struggle to distinguish themselves from synthetic competitors. Cognitive fatigue — constant skepticism exhausts audiences, leading to disengagement or blind acceptance. The danger is not that people believe everything, but that they stop believing anything reliably. Emerging Responses and Adaptations Society is beginning to respond in multiple ways: Provenance Technologies Digital watermarking and authenticity tracking aim to verify origins of media. AI Literacy Education increasingly focuses on understanding how generative systems work. Platform Responsibility Social platforms experiment with labeling synthetic content. Cultural Adaptation Audiences may gradually shift from trusting images to trusting networks, reputations, or verification systems. Historically, new media technologies eventually produce new norms of trust. Printing presses, photography, and the internet each forced similar adjustments — though none moved this quickly. A New Definition of Authority Synthetic authority does not necessarily signal the end of truth. Instead, it marks a transition. Authority may evolve from: Seeing → verifying Believing → evaluating Authenticity → transparency Future credibility may depend less on whether content is artificial and more on whether its creation process is disclosed and accountable. In this sense, the challenge is not stopping synthetic media — an impossible task — but redesigning trust for a world where reality can be generated. Conclusion: Living With Generated Reality Generative AI has not simply created new tools; it has changed the relationship between perception and belief. Images no longer require events. Voices no longer require speakers. Authority no longer requires origin. We are moving into a cultural landscape where persuasion can be manufactured as easily as text, and where reality competes with simulation for attention. The question facing society is no longer “Is this real?” but rather: “What makes something worthy of trust when reality itself can be synthesized?” The answer
Introduction Edge AI is transforming how computer vision systems are deployed, moving intelligence from the cloud directly onto devices operating in real time. NVIDIA Jetson platforms make this possible by combining GPU acceleration, low power consumption, and optimized AI software stacks. With the latest Ultralytics YOLO26 model, developers can achieve faster inference, improved detection accuracy, and efficient deployment on embedded systems. When combined with NVIDIA DeepStream SDK and TensorRT optimization, YOLO26 becomes a powerful solution for real-time video analytics at the edge. This guide walks through end-to-end integration of YOLO26 with DeepStream on Jetson, enabling scalable, production-ready object detection pipelines. Why DeepStream for Edge AI? Running raw inference scripts works for experimentation, but production deployments require: High-throughput video processing Hardware acceleration Multi-stream scalability Efficient memory handling Pipeline-based architecture DeepStream provides: ✅ GPU-accelerated video decoding✅ Zero-copy memory pipelines✅ Batch inference support✅ Built-in tracking and analytics✅ RTSP and camera streaming support Instead of processing frames manually, DeepStream builds optimized pipelines using GStreamer. System Architecture Overview The deployment stack looks like this: Camera / Video Stream ↓ Video Decode (NVDEC) ↓ DeepStream Pipeline ↓ TensorRT Engine (YOLO26) ↓ Object Detection Metadata ↓ Display / Stream / Analytics Key components: Component Purpose YOLO26 Object detection model TensorRT Optimized inference engine DeepStream Video analytics pipeline Jetson GPU Hardware acceleration Hardware Requirements Supported Jetson platforms: Jetson Nano (limited performance) Jetson Xavier NX Jetson AGX Xavier Jetson Orin Nano Jetson Orin NX Jetson AGX Orin (recommended) Recommended minimum: 8GB RAM JetPack 6.x CUDA + TensorRT installed Software Stack Ensure the following are installed: JetPack SDK CUDA Toolkit TensorRT DeepStream SDK Python 3.8+ Ultralytics framework Verify installation: deepstream-app –version-all Step 1 — Install Ultralytics YOLO26 Clone and install dependencies: pip install ultralytics Test inference: yolo predict model=yolo26.pt source=bus.jpg If inference works, proceed to export. Step 2 — Export YOLO26 to ONNX DeepStream uses TensorRT engines, so first export the model. yolo export model=yolo26.pt format=onnx opset=12 Output: yolo26.onnx Verify ONNX model: pip install onnxruntime python -c "import onnx; onnx.load('yolo26.onnx')" Step 3 — Convert ONNX to TensorRT Engine Use TensorRT to optimize inference for Jetson GPU. /usr/src/tensorrt/bin/trtexec –onnx=yolo26.onnx –saveEngine=yolo26.engine –fp16 Optional INT8 optimization (advanced): –int8 –calib=calibration.cache Benefits: Lower latency Reduced memory usage Hardware-specific optimization Step 4 — Integrate YOLO26 with DeepStream DeepStream requires a custom parser for YOLO outputs. Directory Structure deepstream_yolo26/ ├── config_infer_primary.txt ├── yolo26.engine ├── labels.txt └── custom_parser.cpp Configure Primary Inference Create: config_infer_primary.txt [property] gpu-id=0 net-scale-factor=0.003921569 model-engine-file=yolo26.engine labelfile-path=labels.txt batch-size=1 network-mode=2 num-detected-classes=80 process-mode=1 gie-unique-id=1 Network modes: 0 → FP32 1 → INT8 2 → FP16 Custom Bounding Box Parser YOLO models output tensors differently from standard detectors.You must implement a parser that converts raw outputs into: bounding boxes class IDs confidence scores Compile parser: make Output: LZ4ezwuSpTeD9pQKcUaPpHYUhy53QerXiD Step 5 — Modify DeepStream App Config Edit: deepstream_app_config.txt Set primary inference: [primary-gie] enable=1 config-file=config_infer_primary.txt Step 6 — Run DeepStream Pipeline Launch: deepstream-app -c deepstream_app_config.txt You should see: ✅ Real-time detections✅ Bounding boxes rendered✅ GPU utilization active Performance Optimization Tips 1. Use FP16 or INT8 FP16 typically provides: 2–3× faster inference Minimal accuracy loss INT8 gives maximum performance but requires calibration. 2. Increase Batch Size (Multi-Stream) batch-size=4 Useful for multiple RTSP cameras. 3. Enable Zero-Copy Memory DeepStream automatically uses NVMM buffers to avoid CPU copies. 4. Use Hardware Decoder Ensure pipeline uses: nvv4l2decoder instead of software decoding. Expected Performance (Approximate) Device FPS (YOLO26 FP16) Jetson Nano 6–10 FPS Xavier NX 25–40 FPS Orin Nano 40–70 FPS AGX Orin 90–150 FPS Performance varies with resolution and model size. Real-World Use Cases YOLO26 + DeepStream enables: Smart city surveillance Retail analytics Industrial safety monitoring Traffic analysis Robotics perception Autonomous inspection systems Troubleshooting Engine Not Loading Rebuild engine directly on Jetson: trtexec –onnx=model.onnx TensorRT engines are hardware-specific. No Bounding Boxes Appearing Check: parser library path class count output tensor names Low FPS Verify GPU usage: tegrastats Common causes: CPU decoding FP32 inference incorrect batch configuration Best Practices for Production Build TensorRT engines on target hardware Use RTSP streams for scalability Enable tracking plugins Log inference metadata Containerize with Docker Conclusion Integrating YOLO26 with DeepStream on NVIDIA Jetson unlocks a highly optimized edge AI pipeline capable of real-time video analytics at production scale. By combining: YOLO26 detection accuracy TensorRT acceleration DeepStream pipeline efficiency Jetson edge hardware developers can deploy scalable, low-latency AI systems without relying on cloud infrastructure. This workflow forms a strong foundation for next-generation edge vision applications across industries. Visit Our Data Annotation Service Visit Now
Introduction Artificial intelligence is getting bigger every year. Modern Large Language Models (LLMs) like Llama, Qwen, and GPT-style models often contain tens of billions of parameters, usually requiring expensive GPUs with massive VRAM. For most developers, startups, and researchers, running these models locally feels impossible. But a new tool called oLLM is quietly changing that. Imagine running models as large as 80B parameters on a consumer GPU with just 8GB of VRAM. Sounds unrealistic, right? Yet that’s exactly what oLLM enables through clever engineering and smart memory management. In this article, we’ll explore what oLLM is, how it works, and why it may become the secret ingredient for running massive AI models on tiny hardware. What is oLLM? oLLM is a lightweight Python library designed for large-context LLM inference on resource-limited hardware. It builds on top of popular frameworks like Hugging Face Transformers and PyTorch, allowing developers to run large AI models locally without requiring enterprise-grade GPUs. The key idea behind oLLM is simple: Instead of forcing everything into GPU memory, intelligently move parts of the model to other storage layers. With this approach, models that normally need hundreds of gigabytes of VRAM can run on standard consumer hardware. For example, some setups allow models such as: Llama-3 style models GPT-OSS-20B Qwen-Next-80B to run on a machine with only 8GB GPU VRAM plus SSD storage. The Problem with Running Large AI Models Traditional AI inference assumes one thing: All model weights must fit inside GPU memory. This becomes a huge bottleneck because: Model Size Typical VRAM Needed 7B ~16 GB 13B ~24 GB 70B ~140 GB 80B ~190 GB Clearly, that’s far beyond what most consumer GPUs can handle. Even developers with powerful GPUs often rely on quantization, which compresses model weights to reduce memory usage. But quantization comes with trade-offs: Reduced accuracy Lower output quality Compatibility limitations oLLM takes a different approach. The Core Innovation: SSD Offloading The breakthrough behind oLLM is SSD-based memory offloading. Instead of loading the entire model into GPU memory, oLLM streams model components dynamically between: GPU VRAM System RAM High-speed SSD This means your GPU only holds the active parts of the model at any given time. The technique allows models to run that are 10x larger than the available GPU memory. Think of it like this: Traditional AI Model → GPU VRAM oLLM Model → SSD + RAM + GPU (streamed dynamically) By turning storage into an extension of GPU memory, oLLM bypasses the biggest limitation in local AI development. No Quantization Needed Another major advantage of oLLM is that it does not require quantization. Instead of compressing model weights, it keeps them in high precision formats such as FP16 or BF16, preserving the original model quality. That means: Better reasoning quality More accurate outputs More reliable responses For developers working on research, compliance analysis, or long-document reasoning, this can make a huge difference. Ultra-Long Context Windows Many AI tools struggle with large documents because of context limits. oLLM supports extremely long context windows — up to 100,000 tokens. This allows the model to process: Entire books Long research papers Legal contracts Massive log files Large datasets —all in a single prompt. This opens the door for advanced offline tasks like: document intelligence compliance auditing enterprise knowledge search AI-assisted research Performance Trade-offs Of course, running massive models on small hardware has trade-offs. Since parts of the model are constantly streamed from storage, speed can be slower than running everything in VRAM. For example: Large models may generate around 0.5 tokens per second on consumer GPUs. That might sound slow, but it’s perfectly acceptable for offline workloads, such as: document analysis research tasks batch processing AI pipelines In many cases, cost savings outweigh the speed limitations. Multimodal Capabilities oLLM is not limited to text models. It can also support multimodal AI systems, including models that process: text + audio text + images Examples include models like: Voxtral-Small-24B (audio + text) Gemma-3-12B (image + text) This allows developers to build advanced AI applications that combine multiple data types. Why oLLM Matters for the Future of AI AI is currently dominated by cloud infrastructure and billion-dollar GPU clusters. But tools like oLLM represent a shift toward democratized AI infrastructure. Instead of needing: expensive GPUs massive cloud budgets specialized infrastructure developers can experiment with powerful models on regular hardware. This unlocks new opportunities for: indie developers startups academic researchers privacy-focused applications Local AI and Privacy Running AI locally also has a major benefit: privacy. When models run on your own machine: no data leaves your system no prompts are logged sensitive documents remain private This is especially valuable for industries like: healthcare finance legal services government Use Cases for oLLM Some real-world applications include: Research assistants Analyze entire research papers or datasets locally. Legal document analysis Process massive contracts and legal records with long context windows. Offline AI pipelines Run batch inference jobs without relying on cloud services. Privacy-focused AI tools Keep sensitive data completely local. Developer experimentation Test large models without investing in expensive hardware. Limitations to Know While impressive, oLLM isn’t perfect. Current limitations include: Slower inference compared to full-VRAM setups Heavy SSD usage Limited compatibility with some hardware (like certain Apple Silicon setups) However, these are common trade-offs in early infrastructure tools. As storage speeds and optimization techniques improve, performance will likely get better. The Bigger Trend: AI on Everyday Devices oLLM is part of a larger shift toward local AI computing. We are moving from: Cloud-only AI → Hybrid AI → Fully local AI Future devices may run powerful AI models directly on: laptops smartphones edge devices IoT hardware This transformation will make AI more accessible, private, and decentralized. Final Thoughts oLLM proves something important: You don’t always need a $10,000 GPU server to run powerful AI. Through clever memory management, SSD streaming, and high-precision inference, oLLM enables developers to run massive AI models on surprisingly small hardware. For AI enthusiasts, researchers, and builders, this is an exciting step toward a future
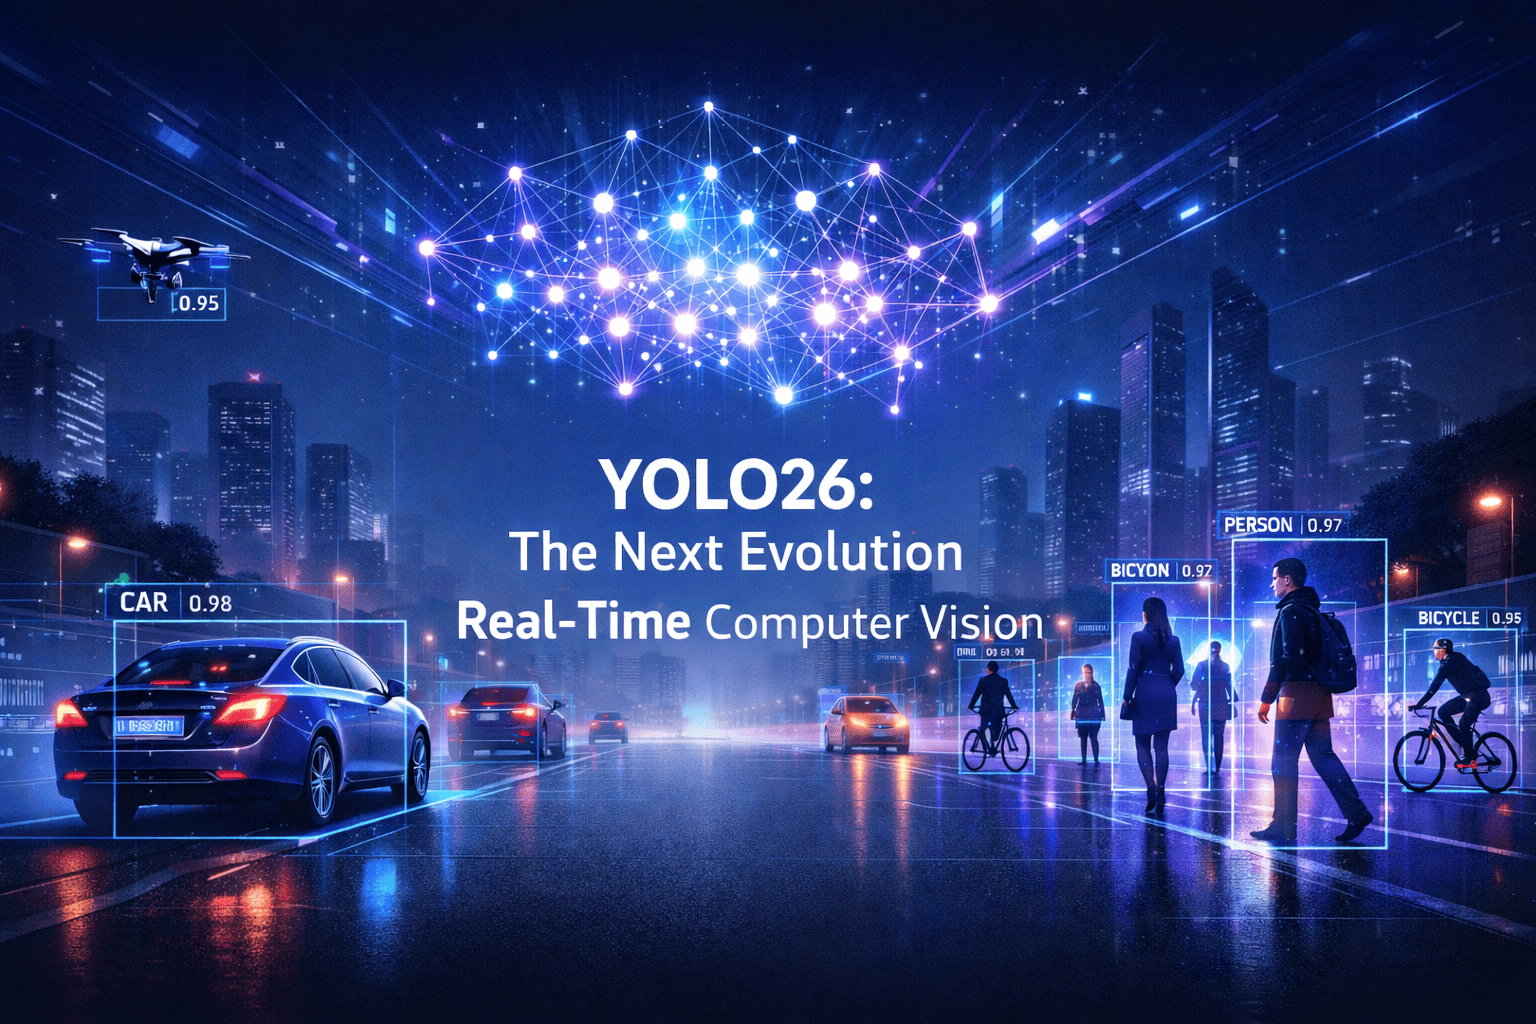
Introduction For nearly a decade, the YOLO (You Only Look Once) family has defined what real-time computer vision means. From the revolutionary YOLOv1 in 2015 to increasingly efficient and accurate successors, each generation has pushed the boundary between speed, accuracy, and deployability. In 2026, a new milestone arrived. YOLO26 is not just another incremental upgrade, it represents a fundamental redesign of how object detection systems are trained, optimized, and deployed, especially for edge devices and real-world AI systems. Built with an edge-first philosophy, YOLO26 introduces end-to-end detection without traditional post-processing, improved stability during training, and multi-task vision capabilities, making it one of the most practical computer vision models ever released. This article explores: ✅ The evolution leading to YOLO26✅ Architecture innovations✅ Why NMS-free detection matters✅ Performance improvements✅ Real-world applications✅ How developers can use YOLO26 today✅ The future of vision AI The Journey to YOLO26 Object detection historically struggled with a difficult trade-off: Faster models sacrificed accuracy Accurate models required heavy computation Real-time deployment remained difficult Earlier YOLO versions gradually solved these problems: YOLOv5–v8 improved usability and modular training YOLOv9–v11 introduced smarter gradient learning and efficiency improvements YOLOv10 began moving toward end-to-end detection pipelines YOLO26 completes this transition. Instead of patching limitations with additional heuristics, it redesigns the pipeline itself. Research analyzing the model highlights that YOLO26 establishes a new efficiency–accuracy balance while outperforming many previous detectors in both speed and precision. What Is YOLO26? YOLO26 is a real-time, multi-task computer vision model optimized for: Object detection Instance segmentation Pose estimation Tracking Classification Unlike earlier detectors, YOLO26 is designed primarily for edge deployment, meaning it runs efficiently on: CPUs Mobile devices Embedded systems Robotics hardware Jetson and ARM platforms The model supports scalable sizes, allowing developers to choose between lightweight and high-accuracy configurations depending on hardware constraints. The Biggest Breakthrough: NMS-Free Detection The Problem with Traditional YOLO Previous YOLO models relied on Non-Maximum Suppression (NMS). NMS removes duplicate bounding boxes after prediction — but it introduces problems: Extra latency Hyperparameter tuning complexity Instability in crowded scenes Deployment inconsistencies YOLO26 Solution YOLO26 eliminates NMS entirely. Instead, detection becomes fully end-to-end — predictions are learned directly during training rather than filtered afterward. This change: Reduces inference time Simplifies deployment Improves consistency across devices Researchers note that removing heuristic post-processing resolves long-standing latency vs. precision trade-offs in object detection systems. Key Architectural Innovations YOLO26 introduces several new mechanisms. 1. Progressive Loss Balancing (ProgLoss) Training object detectors often suffers from unstable gradients. ProgLoss dynamically adjusts learning emphasis during training, allowing: Faster convergence Improved generalization Stable optimization on small datasets 2. Small-Target-Aware Label Assignment (STAL) Small objects are traditionally difficult to detect. STAL improves label assignment by prioritizing tiny and distant objects — critical for: Surveillance Drone imagery Autonomous driving Medical imaging 3. MuSGD Optimizer Inspired by optimization strategies used in large AI models, MuSGD improves: Training stability Quantization readiness Low-precision deployment 4. Removal of Distribution Focal Loss (DFL) Earlier YOLO versions used complex bounding box regression losses. YOLO26 simplifies this pipeline, enabling: Easier export to ONNX/TensorRT Faster inference Reduced memory overhead Where YOLOv1 Fell Short, and Why That’s Important YOLOv1’s limitations weren’t accidental; they revealed deep insights. Small Objects Grid resolution limited detection granularity Small objects often disappeared within grid cells Crowded Scenes One object class prediction per cell Overlapping objects confused the model Localization Precision Coarse bounding box predictions Lower IoU scores than region-based methods Each weakness became a research question that drove YOLOv2, YOLOv3, and beyond. Edge-First Design Philosophy One of YOLO26’s defining goals is predictable latency. Traditional models were GPU-centric. YOLO26 focuses on: CPU acceleration Embedded inference Low-power AI devices Benchmarks show significant CPU inference improvements and reliable performance even without GPUs. This shift makes AI accessible beyond data centers. Performance Improvements YOLO26 improves across three critical axes: Speed Faster inference due to NMS removal Reduced computational overhead Accuracy Better small-object detection Improved dense-scene performance Efficiency Smaller models with higher mAP Stable quantization for edge deployment Studies comparing YOLO26 with earlier generations highlight superior deployment versatility and efficiency across edge hardware platforms. Multi-Task Vision: One Model, Many Tasks YOLO26 moves toward unified vision AI. Supported tasks include: Detection Segmentation Pose estimation Tracking Oriented bounding boxes This reduces the need to maintain separate models for each task, simplifying production pipelines. Real-World Applications YOLO26 unlocks new possibilities across industries. Autonomous Systems Robots navigating dynamic environments Drone inspection systems Smart Cities Traffic monitoring Crowd analysis Security automation Healthcare Real-time medical imaging assistance Surgical instrument tracking Manufacturing Defect detection Quality assurance automation Retail & Logistics Shelf analytics Warehouse automation Because it runs efficiently on edge devices, processing can happen locally — improving privacy and reducing cloud costs. Developer Experience One reason YOLO became dominant is usability — and YOLO26 continues that tradition. Developers benefit from: Simple training pipelines Export to multiple runtimes Easy fine-tuning Real-time video inference Typical workflow: Prepare dataset Train using pretrained weights Export model Deploy on edge device No complex post-processing configuration required. YOLO26 vs Previous YOLO Versions Feature YOLOv8–11 YOLO26 NMS Required Yes No Edge Optimization Moderate Native Multi-Task Support Partial Unified Training Stability Good Improved Deployment Complexity Medium Low YOLO26 marks the transition from fast detectors to deployment-ready AI systems. Challenges and Limitations Despite improvements, challenges remain: Dense overlapping scenes still difficult Training large datasets remains compute-heavy Open-vocabulary detection is limited Transformer integration still evolving Future models may combine YOLO efficiency with foundation-model reasoning. The Future After YOLO26 YOLO26 signals a broader shift in computer vision: 👉 From GPU-centric AI → Edge AI👉 From pipelines → End-to-end learning👉 From single-task → unified perception systems Future developments may include: Vision-language integration Self-supervised detection On-device continual learning Autonomous AI perception stacks Conclusion YOLO26 is more than a version update. It represents a philosophical shift in computer vision engineering — simplifying architecture while improving real-world performance. By removing legacy bottlenecks like NMS, introducing smarter training strategies, and prioritizing edge deployment, YOLO26 brings AI closer to where it matters most: the real world. As AI moves beyond research labs into everyday devices, models like
Introduction Higher education is entering one of the most transformative periods in its history. Just as the internet redefined access to knowledge and online learning reshaped classrooms, Generative Artificial Intelligence (Generative AI) is now redefining how knowledge is created, delivered, and consumed. Unlike traditional AI systems that analyze or classify data, Generative AI can produce new content — including text, code, images, simulations, and even research drafts. Tools powered by large language models are already assisting students with learning, supporting professors in course design, and accelerating academic research workflows. Universities worldwide are moving beyond experimentation. Generative AI is rapidly becoming an essential academic infrastructure — influencing pedagogy, administration, research, and institutional strategy. This article explores how Generative AI is transforming higher education, its opportunities and risks, and what institutions must do to adapt responsibly. What Is Generative AI? Generative AI refers to artificial intelligence systems capable of creating original outputs based on patterns learned from large datasets. These systems rely on advanced machine learning architectures such as: Large Language Models (LLMs) Diffusion models Transformer-based neural networks Multimodal AI systems Examples of generative outputs include: Essays and academic explanations Programming code Research summaries Visual diagrams Educational simulations Interactive tutoring conversations In higher education, this ability shifts AI from being a passive analytical tool into an active collaborator in learning and research. Personalized Learning at Scale One of the most powerful applications of Generative AI is personalized education. Traditional classrooms struggle to adapt to individual learning speeds and styles. AI-powered systems can now: Explain complex concepts in multiple ways Adjust difficulty dynamically Provide instant feedback Generate customized practice exercises Support multilingual learning A student struggling with calculus, for example, can receive step-by-step explanations tailored to their understanding level — something previously impossible at scale. Benefits for Students 24/7 academic assistance Reduced learning gaps Improved engagement Increased confidence in difficult subjects Generative AI effectively acts as a personal academic tutor available anytime. The Evolution of Technology in Higher Education To understand the impact of Generative AI, it helps to view it within the broader evolution of educational technology: Era Technology Impact Pre-2000 Digital libraries and basic computing 2000–2015 Learning Management Systems (LMS) and online courses 2015–2022 Data analytics and adaptive learning 2023–Present Generative AI and intelligent academic assistance While previous technologies improved access and efficiency, Generative AI changes something deeper — how knowledge itself is produced and understood. Empowering Educators, Not Replacing Them A common misconception is that AI will replace professors. In reality, Generative AI is emerging as a productivity amplifier. Educators can use AI to: Draft lecture materials Create quizzes and assignments Generate case studies Design simulations Summarize research papers Translate learning content This reduces administrative workload and allows instructors to focus on what matters most: Mentorship Critical discussion Research supervision Human-centered teaching The role of educators is shifting from information delivery toward learning facilitation and intellectual guidance. Revolutionizing Academic Research Research is another domain experiencing rapid transformation. Generative AI accelerates research workflows by helping scholars: Conduct literature reviews faster Summarize thousands of papers Generate hypotheses Assist with coding and data analysis Draft early manuscript versions For interdisciplinary research, AI can bridge knowledge gaps across domains, helping researchers explore unfamiliar fields more efficiently. However, AI-generated research must always be validated by human expertise to maintain academic integrity. AI-Assisted Writing and Academic Productivity Writing is central to higher education, and Generative AI has dramatically changed the writing process. Students and researchers now use AI tools for: Brainstorming ideas Structuring arguments Improving clarity and grammar Formatting citations Editing drafts When used responsibly, AI becomes a thinking partner, not a shortcut. Universities increasingly encourage transparent AI usage policies rather than outright bans. Administrative Transformation Beyond classrooms and research, Generative AI is reshaping university operations. Applications include: Automated student support chatbots Enrollment assistance Academic advising systems Curriculum planning analysis Predictive student success modeling Institutions can improve efficiency while providing faster and more personalized student services. Ethical Challenges and Academic Integrity Despite its benefits, Generative AI introduces serious challenges. Key Concerns Academic plagiarism Overreliance on AI-generated work Bias in training data Hallucinated information Data privacy risks Universities must rethink assessment methods. Instead of memorization-based exams, institutions are moving toward: Project-based learning Oral examinations Critical reasoning evaluation AI-assisted but transparent workflows The goal is not to eliminate AI usage but to teach responsible AI literacy. The Rise of AI Literacy as a Core Skill Just as digital literacy became essential in the early 2000s, AI literacy is becoming a foundational academic skill. Students must learn: How AI systems work When AI outputs are unreliable Ethical usage practices Prompt engineering Verification and fact-checking Future graduates will not compete against AI — they will compete against people who know how to use AI effectively. Challenges Universities Must Overcome Adopting Generative AI at scale requires addressing institutional barriers: Faculty training gaps Policy uncertainty Infrastructure costs Data governance concerns Resistance to change Universities that delay adaptation risk falling behind in global academic competitiveness. The Future of Higher Education with Generative AI Looking ahead, several trends are emerging: AI-native universities and curricula Fully personalized degree pathways Intelligent research assistants Multimodal learning environments AI-driven virtual laboratories Education may shift from standardized programs toward adaptive lifelong learning ecosystems. Best Practices for Responsible Adoption Institutions should consider: ✅ Clear AI usage guidelines✅ Faculty and student training programs✅ Transparent disclosure policies✅ Human oversight in assessment✅ Ethical AI governance frameworks Responsible adoption ensures innovation without compromising academic values. Conclusion Generative AI is not simply another educational technology trend — it represents a structural transformation in how higher education operates. By enabling personalized learning, accelerating research, empowering educators, and improving institutional efficiency, Generative AI has the potential to democratize knowledge at an unprecedented scale. The universities that succeed will not be those that resist AI, but those that integrate it thoughtfully, ethically, and strategically. Higher education is evolving from static knowledge delivery toward dynamic human-AI collaboration, preparing students for a future where creativity, critical thinking, and technological fluency define success. Visit Our Data Annotation Service Visit Now
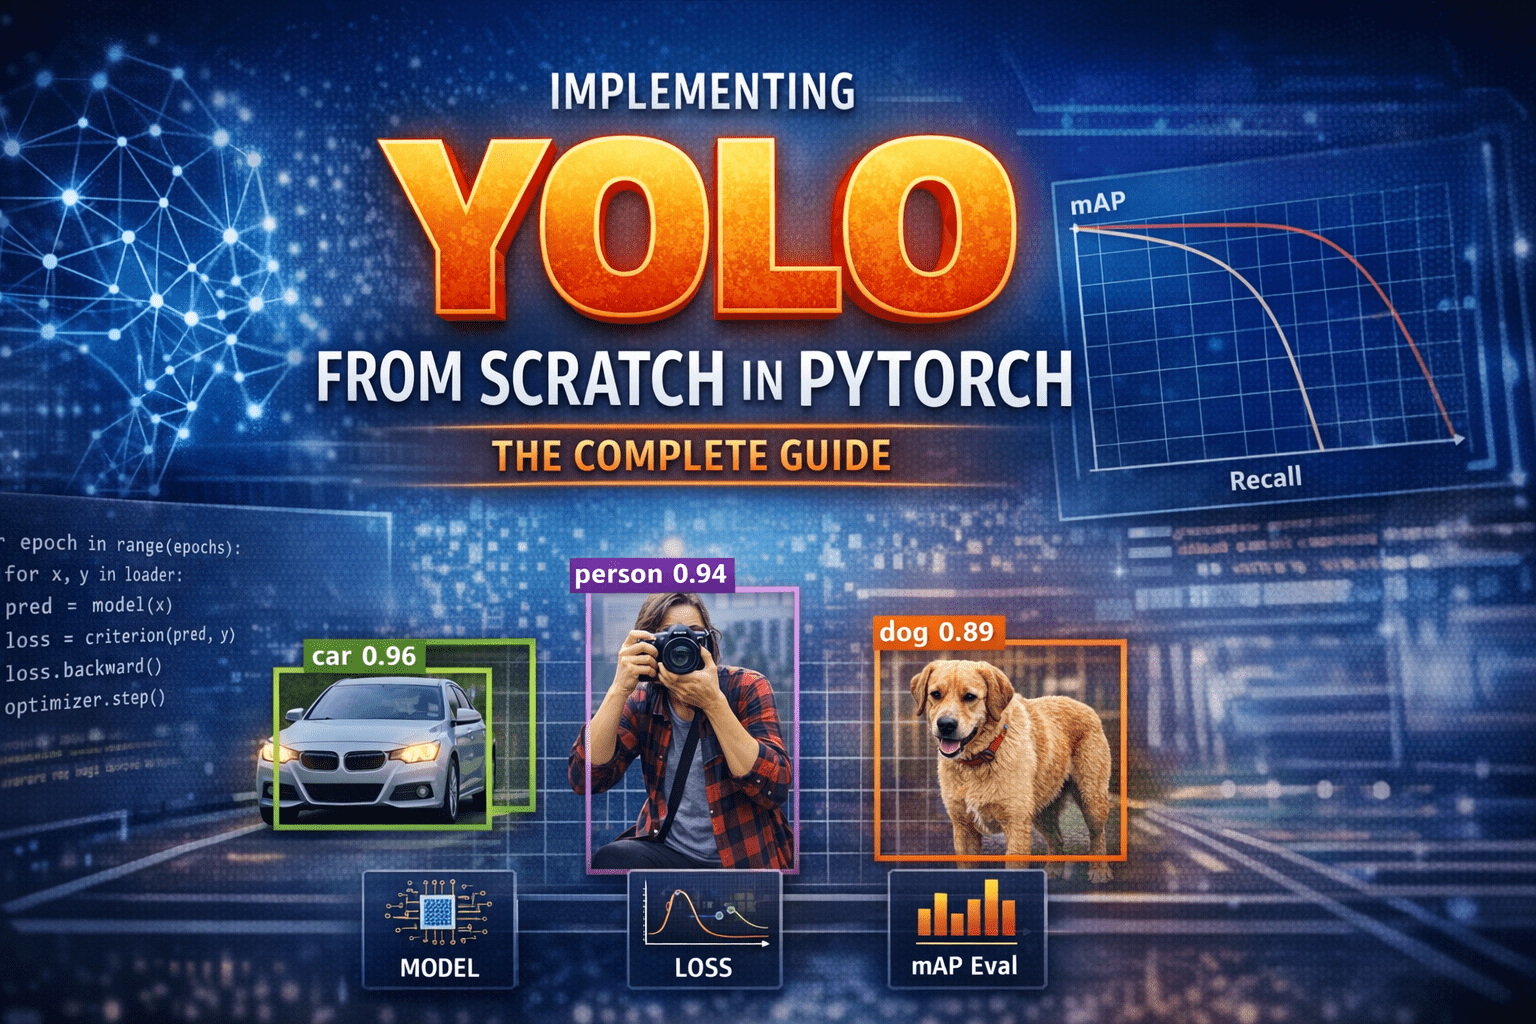
Introduction – Why YOLO Changed Everything Before YOLO, computers did not “see” the world the way humans do.Object detection systems were careful, slow, and fragmented. They first proposed regions that might contain objects, then classified each region separately. Detection worked—but it felt like solving a puzzle one piece at a time. In 2015, YOLO—You Only Look Once—introduced a radical idea: What if we detect everything in one single forward pass? Instead of multiple stages, YOLO treated detection as a single regression problem from pixels to bounding boxes and class probabilities. This guide walks through how to implement YOLO completely from scratch in PyTorch, covering: Mathematical formulation Network architecture Target encoding Loss implementation Training on COCO-style data mAP evaluation Visualization & debugging Inference with NMS Anchor-box extension 1) What YOLO means (and what we’ll build) YOLO (You Only Look Once) is a family of object detection models that predict bounding boxes and class probabilities in one forward pass. Unlike older multi-stage pipelines (proposal → refine → classify), YOLO-style detectors are dense predictors: they predict candidate boxes at many locations and scales, then filter them. There are two “eras” of YOLO-like detectors: YOLOv1-style (grid cells, no anchors): each grid cell predicts a few boxes directly. Anchor-based YOLO (YOLOv2/3 and many derivatives): each grid cell predicts offsets relative to pre-defined anchor shapes; multiple scales predict small/medium/large objects. What we’ll implement A modern, anchor-based YOLO-style detector with: Multi-scale heads (e.g., 3 scales) Anchor matching (target assignment) Loss with box regression + objectness + classification Decoding + NMS mAP evaluation COCO/custom dataset training support We’ll keep the architecture understandable rather than exotic. You can later swap in a bigger backbone easily. 2) Bounding box formats and coordinate systems You must be consistent. Most training bugs come from box format confusion. Common box formats: XYXY: (x1, y1, x2, y2) top-left & bottom-right XYWH: (cx, cy, w, h) center and size Normalized: coordinates in [0, 1] relative to image size Absolute: pixel coordinates Recommended internal convention Store dataset annotations as absolute XYXY in pixels. Convert to normalized only if needed, but keep one standard. Why XYXY is nice: Intersection/union is straightforward. Clamping to image bounds is simple. 3) IoU, GIoU, DIoU, CIoU IoU (Intersection over Union) is the standard overlap metric: IoU=∣A∩B∣/∣A∪B∣ But IoU has a problem: if boxes don’t overlap, IoU = 0, gradient can be weak. Modern detectors often use improved regression losses: GIoU: adds penalty for non-overlapping boxes based on smallest enclosing box DIoU: penalizes center distance CIoU: DIoU + aspect ratio consistency Practical rule: If you want a strong default: CIoU for box regression. If you want simpler: GIoU works well too. We’ll implement IoU + CIoU (with safe numerics). 4) Anchor-based YOLO: grids, anchors, predictions A YOLO head predicts at each grid location. Suppose a feature map is S x S (e.g., 80×80). Each cell can predict A anchors (e.g., 3). For each anchor, prediction is: Box offsets: tx, ty, tw, th Objectness logit: to Class logits: tc1..tcC So tensor shape per scale is:(B, A*(5+C), S, S) or (B, A, S, S, 5+C) after reshaping. How offsets become real boxes A common YOLO-style decode (one of several valid variants): bx = (sigmoid(tx) + cx) / S by = (sigmoid(ty) + cy) / S bw = (anchor_w * exp(tw)) / img_w (or normalized by S) bh = (anchor_h * exp(th)) / img_h Where (cx, cy) is the integer grid coordinate. Important: Your encode/decode must match your target assignment encoding. 5) Dataset preparation Annotation formats Your custom dataset can be: COCO JSON Pascal VOC XML YOLO txt (class cx cy w h normalized) We’ll support a generic internal representation: Each sample returns: image: Tensor [3, H, W] targets: Tensor [N, 6] with columns: [class, x1, y1, x2, y2, image_index(optional)] Augmentations For object detection, augmentations must transform boxes too: Resize / letterbox Random horizontal flip Color jitter Random affine (optional) Mosaic/mixup (advanced; optional) To keep this guide implementable without fragile geometry, we’ll do: resize/letterbox random flip HSV jitter (optional) 6) Building blocks: Conv-BN-Act, residuals, necks A clean baseline module: Conv2d -> BatchNorm2d -> SiLUSiLU (a.k.a. Swish) is common in YOLOv5-like families; LeakyReLU is common in YOLOv3. We can optionally add residual blocks for a stronger backbone, but even a small backbone can work to validate the pipeline. 7) Model design A typical structure: Backbone: extracts feature maps at multiple strides (8, 16, 32) Neck: combines features (FPN / PAN) Head: predicts detection outputs per scale We’ll implement a lightweight backbone that produces 3 feature maps and a simple FPN-like neck. 8) Decoding predictions At inference: Reshape outputs per scale to (B, A, S, S, 5+C) Apply sigmoid to center offsets + objectness (and often class probs) Convert to XYXY in pixel coordinates Flatten all scales into one list of candidate boxes Filter by confidence threshold Apply NMS per class (or class-agnostic NMS) 9) Target assignment (matching GT to anchors) This is the heart of anchor-based YOLO. For each ground-truth box: Determine which scale(s) should handle it (based on size / anchor match). For the chosen scale, compute IoU between GT box size and each anchor size (in that scale’s coordinate system). Select best anchor (or top-k anchors). Compute the grid cell index from the GT center. Fill the target tensors at [anchor, gy, gx] with: box regression targets objectness = 1 class target Encoding regression targets If using decode: bx = (sigmoid(tx) + cx)/Sthen target for tx is sigmoid^-1(bx*S – cx) but that’s messy. Instead, YOLO-style training often directly supervises: tx_target = bx*S – cx (a value in [0,1]) and trains with BCE on sigmoid output, or MSE on raw. tw_target = log(bw / anchor_w) (in pixels or normalized units) We’ll implement a stable variant: predict pxy = sigmoid(tx,ty) and supervise pxy with BCE/MSE to match fractional offsets predict pwh = exp(tw,th)*anchor and supervise with CIoU on decoded boxes (recommended) That’s simpler: do regression loss on decoded boxes, not on tw/th directly. 10) Loss functions YOLO-style loss usually has: Box loss: CIoU/GIoU between predicted
Introduction Before YOLO, computers didn’t see the world the way humans do. They inspected it slowly, cautiously, one object proposal at a time. Object detection worked, but it was fragmented, computationally expensive, and far from real time. Then, in 2015, a single paper changed everything. “You Only Look Once: Unified, Real-Time Object Detection” by Joseph Redmon et al. introduced YOLOv1, a model that redefined how machines perceive images. It wasn’t just an incremental improvement, it was a conceptual revolution. This is the story of how YOLOv1 was born, how it worked, and why its impact still echoes across modern computer vision systems today. Object Detection Before YOLO: A Fragmented World Before YOLOv1, object detection research was dominated by complex pipelines stitched together from multiple independent components. Each component worked reasonably well on its own, but the overall system was fragile, slow, and difficult to optimize. The Classical Detection Pipeline A typical object detection system before 2015 looked like this: Hand-crafted or heuristic-based region proposal Selective Search Edge Boxes Sliding windows (earlier methods) Feature extraction CNN features (AlexNet, VGG, etc.) Run separately on each proposed region Classification SVMs or softmax classifiers One classifier per region Bounding box regression Fine-tuning box coordinates post-classification Each stage was trained independently, often with different objectives. Why This Was a Problem Redundant computationThe same image features were recomputed hundreds of times. No global contextThe model never truly “saw” the full image at once. Pipeline fragilityErrors in region proposals could never be recovered downstream. Poor real-time performanceEven Fast R-CNN struggled to exceed a few FPS. Object detection worked, but it felt like a workaround, not a clean solution. The YOLO Philosophy: Detection as a Single Learning Problem YOLOv1 challenged the dominant assumption that object detection must be a multi-stage problem. Instead, it asked a radical question: Why not predict everything at once, directly from pixels? A Conceptual Shift YOLO reframed object detection as: A single regression problem from image pixels to bounding boxes and class probabilities. This meant: No region proposals No sliding windows No separate classifiers No post-hoc stitching Just one neural network, trained end-to-end. Why This Matters This shift: Simplified the learning objective Reduced engineering complexity Allowed gradients to flow across the entire detection task Enabled true real-time inference YOLO didn’t just optimize detection, it redefined what detection was. How YOLOv1 Works: A New Visual Grammar YOLOv1 introduced a structured way for neural networks to “describe” an image. Grid-Based Responsibility Assignment The image is divided into an S × S grid (commonly 7 × 7). Each grid cell: Is responsible for objects whose center lies within it Predicts bounding boxes and class probabilities This created a spatial prior that helped the network reason about where objects tend to appear. Bounding Box Prediction Details Each grid cell predicts B bounding boxes, where each box consists of: x, y → center coordinates (relative to the grid cell) w, h → width and height (relative to the image) confidence score The confidence score encodes: Pr(object) × IoU(predicted box, ground truth) This was clever, it forced the network to jointly reason about objectness and localization quality. Class Prediction Strategy Instead of predicting classes per bounding box, YOLOv1 predicted: One set of class probabilities per grid cell This reduced complexity but introduced limitations in crowded scenes, a trade-off YOLOv1 knowingly accepted. YOLOv1 Architecture: Designed for Global Reasoning YOLOv1’s network architecture was intentionally designed to capture global image context. Architecture Breakdown 24 convolutional layers 2 fully connected layers Inspired by GoogLeNet (but simpler) Pretrained on ImageNet classification The final fully connected layers allowed YOLO to: Combine spatially distant features Understand object relationships Avoid false positives caused by local texture patterns Why Global Context Matters Traditional detectors often mistook: Shadows for objects Textures for meaningful regions YOLO’s global reasoning reduced these errors by understanding the scene as a whole. The YOLOv1 Loss Function: Balancing Competing Objectives Training YOLOv1 required solving a delicate optimization problem. Multi-Part Loss Components YOLOv1’s loss function combined: Localization loss Errors in x, y, w, h Heavily weighted to prioritize accurate boxes Confidence loss Penalized incorrect objectness predictions Classification loss Penalized wrong class predictions Smart Design Choices Higher weight for bounding box regression Lower weight for background confidence Square root applied to width and height to stabilize gradients These design choices directly influenced how future detection losses were built. Speed vs Accuracy: A Conscious Design Trade-Off YOLOv1 was explicit about its priorities. YOLO’s Position Slightly worse localization is acceptable if it enables real-time vision. Performance Impact YOLOv1 ran an order of magnitude faster than competing detectors Enabled deployment on: Live camera feeds Robotics systems Embedded devices (with Fast YOLO) This trade-off reshaped how researchers evaluated detection systems, not just by accuracy, but by usability. Where YOLOv1 Fell Short, and Why That’s Important YOLOv1’s limitations weren’t accidental; they revealed deep insights. Small Objects Grid resolution limited detection granularity Small objects often disappeared within grid cells Crowded Scenes One object class prediction per cell Overlapping objects confused the model Localization Precision Coarse bounding box predictions Lower IoU scores than region-based methods Each weakness became a research question that drove YOLOv2, YOLOv3, and beyond. Why YOLOv1 Changed Computer Vision Forever YOLOv1 didn’t just introduce a model, it introduced a mindset. End-to-End Learning as a Principle Detection systems became: Unified Differentiable Easier to deploy and optimize Real-Time as a First-Class Metric After YOLO: Speed was no longer optional Real-time inference became an expectation A Blueprint for Future Detectors Modern architectures, CNN-based and transformer-based alike, inherit YOLO’s core ideas: Dense prediction Single-pass inference Deployment-aware design Final Reflection: The Day Detection Became Vision YOLOv1 marked the moment when object detection stopped being a patchwork of tricks and became a coherent vision system. It taught the field that: Seeing fast unlocks new realities Simplicity scales End-to-end learning changes how machines understand the world YOLO didn’t just look once. It made computer vision see differently forever. Visit Our Data Annotation Service Visit Now Lorem ipsum dolor sit amet, consectetur adipiscing elit. Ut elit tellus, luctus nec