

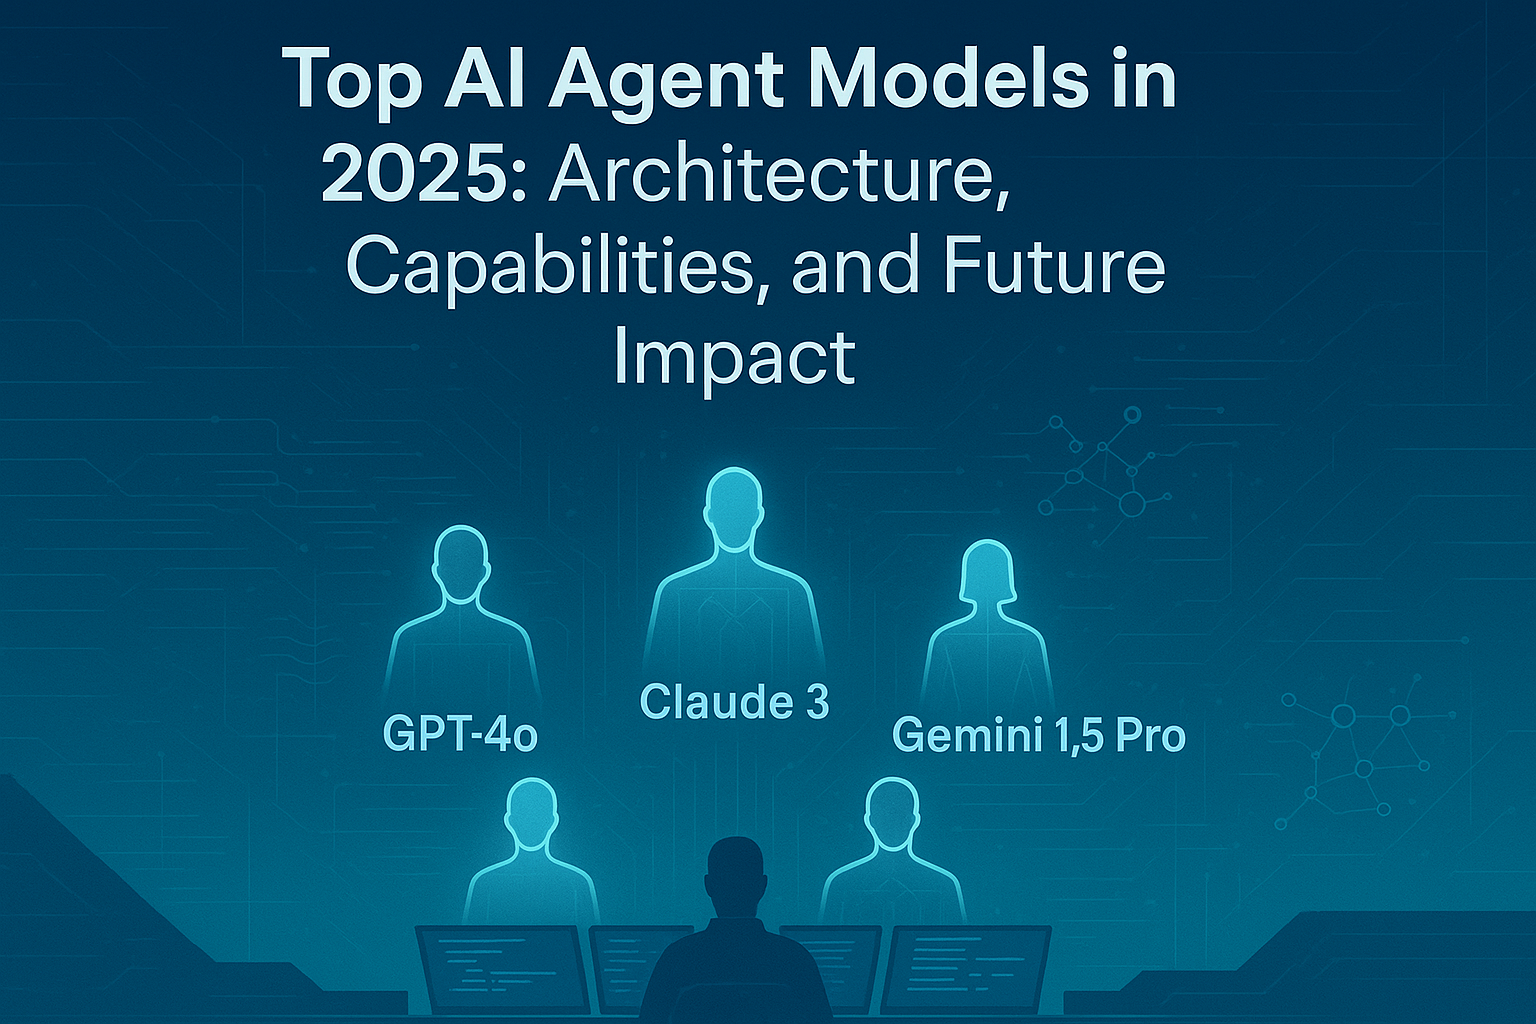
Introduction: The Rise of Autonomous AI Agents In 2025, the artificial intelligence landscape has shifted decisively from monolithic language models to autonomous, task-solving AI agents. Unlike traditional models that respond to queries in isolation, AI agents operate persistently, reason about the environment, plan multi-step actions, and interact autonomously with tools, APIs, and users. These models have blurred the lines between “intelligent assistant” and “independent digital worker.” So, what is an AI agent? At its core, an AI agent is a model—or a system of models—capable of perceiving inputs, reasoning over them, and acting in an environment to achieve a goal. Inspired by cognitive science, these agents are often structured around planning, memory, tool usage, and self-reflection. AI agents are becoming vital across industries: In software engineering, agents autonomously write and debug code. In enterprise automation, agents optimize workflows, schedule tasks, and interact with databases. In healthcare, agents assist doctors by triaging symptoms and suggesting diagnostic steps. In research, agents summarize papers, run simulations, and propose experiments. This blog takes a deep dive into the most important AI agent models as of 2025—examining how they work, where they shine, and what the future holds. What Sets AI Agents Apart? A good AI agent isn’t just a chatbot. It’s an autonomous decision-maker with several cognitive faculties: Perception: Ability to process multimodal inputs (text, image, video, audio, or code). Reasoning: Logical deduction, chain-of-thought reasoning, symbolic computation. Planning: Breaking complex goals into actionable steps. Memory: Short-term context handling and long-term retrieval augmentation. Action: Executing steps via APIs, browsers, code, or robotic limbs. Learning: Adapting via feedback, environment signals, or new data. Agents may be powered by a single monolithic model (like GPT-4o) or consist of multiple interacting modules—a planner, a retriever, a policy network, etc. In short, agents are to LLMs what robots are to engines. They embed LLMs into functional shells with autonomy, memory, and tool use. Top AI Agent Models in 2025 Let’s explore the standout AI agent models powering the revolution. OpenAI’s GPT Agents (GPT-4o-based) OpenAI’s GPT-4o introduced a fully multimodal model capable of real-time reasoning across voice, text, images, and video. Combined with the Assistant API, users can instantiate agents with: Tool use (browser, code interpreter, database) Memory (persistent across sessions) Function calling & self-reflection OpenAI also powers Auto-GPT-style systems, where GPT-4o is embedded into recursive loops that autonomously plan and execute tasks. Google DeepMind’s Gemini Agents The Gemini family—especially Gemini 1.5 Pro—excels in planning and memory. DeepMind’s vision combines the planning strengths of AlphaZero with the language fluency of PaLM and Gemini. Gemini agents in Google Workspace act as task-level assistants: Compose emails, generate documents Navigate multiple apps intelligently Interact with users via voice or text Gemini’s planning agents are also used in robotics (via RT-2 and SayCan) and simulated environments like MuJoCo. Meta’s CICERO and Beyond Meta made waves with CICERO, the first agent to master diplomacy via natural language negotiation. In 2025, successors to CICERO apply social reasoning in: Multi-agent environments (games, simulations) Strategic planning (negotiation, bidding, alignment) Alignment research (theory of mind, deception detection) Meta’s open-source tools like AgentCraft are used to build agents that reason about social intent, useful in HR bots, tutors, and economic simulations. Anthropic’s Claude Agent Models Claude 3 models are known for their robust alignment, long context (up to 200K tokens), and chain-of-thought precision. Claude Agents focus on: Enterprise automation (workflows, legal review) High-stakes environments (compliance, safety) Multi-step problem-solving Anthropic’s strong safety emphasis makes Claude agents ideal for sensitive domains. DeepMind’s Gato & Gemini Evolution Originally released in 2022, Gato was a generalist agent trained on text, images, and control. In 2025, Gato’s successors are now part of Gemini Evolution, handling: Embodied robotics tasks Real-world simulations Game environments (Minecraft, StarCraft II) Gato-like models are embedded in agents that plan physical actions and adapt to real-time environments, critical in smart home devices and autonomous vehicles. Mistral/Mixtral Agents Mistral and its Mixture-of-Experts model Mixtral have been open-sourced, enabling developers to run powerful agent models locally. These agents are favored for: On-device use (privacy, speed) Custom agent loops with LangChain, AutoGen Decentralized agent networks Strength: Open-source, highly modular, cost-efficient. Hugging Face Transformers + Autonomy Stack Hugging Face provides tools like transformers-agent, auto-gptq, and LangChain integration, which let users build agents from any open LLM (like LLaMA, Falcon, or Mistral). Popular features: Tool use via LangChain tools or Hugging Face endpoints Fine-tuned agents for niche tasks (biomedicine, legal, etc.) Local deployment and custom training xAI’s Grok Agents Elon Musk’s xAI developed Grok, a witty and internet-savvy agent integrated into X (formerly Twitter). In 2025, Grok Agents power: Social media management Meme generation Opinion summarization Though often dismissed as humorous, Grok Agents are pushing boundaries in personality, satire, and dynamic opinion reasoning. Cohere’s Command-R+ Agents Cohere’s Command-R+ is optimized for retrieval-augmented generation (RAG) and enterprise search. Their agents excel in: Customer support automation Document Q&A Legal search and research Command-R agents are known for their factuality and search integration. AgentVerse, AutoGen, and LangGraph Ecosystems Frameworks like Microsoft AutoGen, AgentVerse, and LangGraph enable agent orchestration: Multi-agent collaboration (debate, voting, task division) Memory persistence Workflow integration These frameworks are often used to wrap top models (e.g., GPT-4o, Claude 3) into agent collectives that cooperate to solve big problems. Model Architecture Comparison As AI agents evolve, so do the ways they’re built. Behind every capable AI agent lies a carefully crafted architecture that balances modularity, efficiency, and adaptability. In 2025, most leading agents are based on one of two design philosophies: Monolithic Agents (All-in-One Models) These agents rely on a single, large model to perform perception, reasoning, and action planning. Examples: GPT-4o by OpenAI Claude 3 by Anthropic Gemini 1.5 Pro by Google Strengths: Simplicity in deployment Fast response time (no orchestration overhead) Ideal for short tasks or chatbot-like interactions Limitations: Limited long-term memory and persistence Hard to scale across distributed environments Less control over intermediate reasoning steps Modular Agents (Multi-Component Systems) These agents are built from multiple subsystems: Planner: Determines multi-step goals Retriever: Gathers relevant information or

Introduction In the fast-paced world of computer vision, object detection remains a fundamental task. From autonomous vehicles to security surveillance and healthcare, the need to identify and localize objects in images is essential. One architecture that has consistently pushed the boundaries in real-time object detection is YOLO – You Only Look Once. YOLOv12 is the latest and most advanced iteration in the YOLO family. Built upon the strengths of its predecessors, YOLOv12 delivers outstanding speed and accuracy, making it ideal for both research and industrial applications. Whether you’re a total beginner or an AI practitioner looking to sharpen your skills. In this guide will walk you through the essentials of YOLOv12—from installation and training to advanced fine-tuning techniques. We’ll start with the basics: What is YOLOv12? Why is it important? And how is it different from previous versions? What Makes YOLOv12 Unique? YOLOv12 introduces a range of improvements that distinguish it from YOLOv8, v7, and earlier versions: Key Features: Modular Transformer-based Backbone: Leveraging Swin Transformer for hierarchical feature extraction. Dynamic Head Module: Improves context-awareness for better detection accuracy in complex scenes. RepOptimizer: A new optimizer that improves convergence rates. Cross-Stage Partial Networks v3 (CSPv3): Reduces model complexity while maintaining performance. Scalable Architecture: Supports deployment from edge devices to cloud servers seamlessly. YOLOv12 vs YOLOv8: Feature YOLOv8 YOLOv12 Backbone CSPDarknet53 Swin Transformer v2 Optimizer AdamW RepOptimizer Performance High Higher Speed Very Fast Faster Deployment Options Edge, Web Edge, Web, Cloud Installing YOLOv12: Getting Started Getting started with YOLOv12 is easier than ever before, especially with open-source repositories and detailed documentation. Follow these steps to set up YOLOv12 on your local machine. Step 1: System Requirements Python 3.8+ PyTorch 2.x CUDA 11.8+ (for GPU) OpenCV, torchvision Step 2: Clone YOLOv12 Repository git clone https://github.com/WongKinYiu/YOLOv12.git cd YOLOv12 Step 3: Create Virtual Environment python -m venv yolov12-env source yolov12-env/bin/activate # Linux/Mac yolov12-envScriptsactivate # Windows Step 4: Install Dependencies pip install -r requirements.txt Step 5: Download Pretrained Weights YOLOv12 supports pretrained weights. You can use them as a starting point for transfer learning: wget https://github.com/WongKinYiu/YOLOv12/releases/download/v1.0/yolov12.pt Understanding YOLOv12 Architecture YOLOv12 is engineered to balance accuracy and speed through its novel architecture. Components: Backbone (Swin Transformer v2): Processes input images and extracts features. Neck (PANet + BiFPN): Aggregates features at different scales. Head (Dynamic Head): Detects object classes and bounding boxes. Each component is customizable, making YOLOv12 suitable for a wide range of use cases. Innovations: Transformer Integration: Brings better attention mechanisms. RepOptimizer: Trains models with fewer iterations. Flexible Input Resolution: You can train with 640×640 or 1280×1280 images without major modifications. Preparing Your Dataset Before you can train YOLOv12, you need a properly labeled dataset. YOLOv12 supports the YOLO format, which includes a .txt file for each image containing bounding box coordinates and class labels. Step-by-Step Data Preparation: A. Dataset Structure: /dataset /images /train img1.jpg img2.jpg /val img1.jpg img2.jpg /labels /train img1.txt img2.txt /val img1.txt img2.txt B. YOLO Label Format: Each label file contains: All values are normalized between 0 and 1. For example: 0 0.5 0.5 0.2 0.3 C. Tools to Create Annotations: Roboflow: Drag-and-drop interface to label and export in YOLO format. LabelImg: Free, open-source tool with simple UI. CVAT: Great for large datasets and team collaboration. D. Creating data.yaml: This YAML file is required for training and should look like this: train: ./dataset/images/train val: ./dataset/images/val nc: 3 names: [‘car’, ‘person’, ‘bicycle’] Training YOLOv12 on a Custom Dataset Now that your dataset is ready, let’s move to training. A. Training Script YOLOv12 uses a training script similar to previous versions: python train.py –data data.yaml –cfg yolov12.yaml –weights yolov12.pt –epochs 100 –batch-size 16 –img 640 B. Key Parameters Explained: –data: Path to the data.yaml. –cfg: YOLOv12 model configuration. –weights: Starting weights (use ” for training from scratch). –epochs: Number of training cycles. –batch-size: Number of images per batch. –img: Image resolution (e.g., 640×640). C. Monitor Training YOLOv12 integrates with: TensorBoard: tensorboard –logdir runs/train Weights & Biases (wandb): Logs loss curves, precision, recall, and more. D. Training Tips: Use GPU if available; it reduces training time significantly. Start with lower epochs (~50) to test quickly, then increase. Tune batch size based on your system’s memory. E. Saving Checkpoints: By default, YOLOv12 saves model weights every epoch in /runs/train/exp/weights/. Evaluating and Tuning the Model Once training is done, it’s time to evaluate your model. A. Evaluation Metrics: Precision: How accurate the predictions are. Recall: How many objects were detected. mAP (mean Average Precision): Balanced view of precision and recall. YOLOv12 generates a report automatically after training: results.png B. Command to Evaluate: python val.py –weights runs/train/exp/weights/best.pt –data data.yaml –img 640 C. Tuning for Better Accuracy: Augmentations: Enable mixup, mosaic, and HSV shifts. Learning Rate: Lower if the model is unstable. Anchor Optimization: YOLOv12 can auto-calculate optimal anchors for your dataset. Real-Time Inference with YOLOv12 YOLOv12 shines in real-time applications. Here’s how to run inference on images, videos, and webcam feeds. A. Inference on Images: python detect.py –weights best.pt –source data/images/test.jpg –img 640 B. Inference on Videos: python detect.py –weights best.pt –source video.mp4 C. Live Inference via Webcam: python detect.py –weights best.pt –source 0 D. Output: Detected objects are saved in runs/detect/exp/. The script will draw bounding boxes and labels on the images. E. Confidence Threshold: Add –conf 0.4 to increase or decrease sensitivity. Advanced Features and Expert Tweaks YOLOv12 is powerful out of the box, but fine-tuning can unlock even more potential. A. Custom Backbone: Switch to MobileNet or EfficientNet for edge deployment by modifying the yolov12.yaml. B. Hyperparameter Evolution: YOLOv12 includes an automated evolution script: python evolve.py –data data.yaml –img 640 –epochs 50 C. Quantization: Post-training quantization (INT8/FP16) using: TensorRT ONNX OpenVINO D. Multi-GPU Training: Use: python -m torch.distributed.launch –nproc_per_node 2 train.py … E. Exporting the Model: python export.py –weights best.pt –include onnx torchscript YOLOv12 Use Cases in Real Life Here are popular use cases where YOLOv12 is being deployed: A. Autonomous Vehicles Detects pedestrians, cars, road signs in real time at high FPS. B. Smart Surveillance Recognizes weapons, intruders, and suspicious behaviors with minimal delay.

Introduction Object tracking is a critical task in computer vision, enabling applications like surveillance, autonomous driving, and sports analytics. While object detection identifies objects in a single frame, tracking associates identities to those objects across frames. Combining the speed of YOLOv11 (a hypothetical advanced iteration of the YOLO architecture) with the robustness of ByteTrack. This guide will walk you through building a high-performance object tracking system. What is YOLOv11? YOLOv11 (You Only Look Once version 11) is a state-of-the-art object detection model building on its predecessors. While not an official release as of this writing, we assume it incorporates advancements like: Enhanced Backbone: Improved CSPDarknet for faster feature extraction. Dynamic Convolutions: Adaptive kernel selection for varying object sizes. Optimized Training: Techniques like mosaic augmentation and self-distillation. Higher Accuracy: Better handling of small objects and occlusions. YOLOv11 outputs bounding boxes, class labels, and confidence scores, which serve as inputs for tracking algorithms like ByteTrack. What is Object Tracking? Object tracking is the process of assigning consistent IDs to objects as they move across video frames. This capability is fundamental in fields like surveillance, robotics, and smart city infrastructure. Key algorithms used in tracking include: DeepSORT SORT BoT-SORT StrongSORT ByteTrack What is ByteTrack? ByteTrack is a multi-object tracking (MOT) algorithm that leverages both high-confidence and low-confidence detections. Unlike methods that discard low-confidence detections (often caused by occlusions), ByteTrack keeps them as “background” and matches them with existing tracks. Key features: Two-Stage Matching: First Stage: Match high-confidence detections to tracks. Second Stage: Associate low-confidence detections with unmatched tracks. Kalman Filter: Predicts future track positions. Efficiency: Minimal computational overhead compared to complex re-identification models. ByteTrack in Action: Imagine tracking a person whose confidence score drops due to partial occlusion: Frame t1: confidence = 0.8 Frame t2: confidence = 0.4 (due to a passing object) Frame t3: confidence = 0.1 Instead of losing track, ByteTrack retains low-confidence objects for reassociation. ByteTrack’s Two-Stage Pipeline Stage 1: High-Confidence Matching YOLOv11 detects objects and categorizes boxes: High confidence Low confidence Background (discarded) 2 Predicted positions from t-1 are calculated using Kalman Filter. 3 High-confidence boxes are matched to predicted positions. Matches ✔️ New IDs assigned for unmatched detections Unmatched tracks stored for Stage 2 Stage 2: Low-Confidence Reassociation Remaining predicted tracks are matched to low-confidence detections. Matches ✔️ with lower thresholds. Lost tracks are retained temporarily for potential recovery. This dual-stage mechanism helps maintain persistent tracklets even in challenging scenarios. Full Implementation: YOLOv11 + ByteTrack Step 1: Install Ultralytics YOLO pip install git+https://github.com/ultralytics/ultralytics.git@main Step 2: Import Dependencies import os import cv2 from ultralytics import YOLO # Load Pretrained Model model = YOLO(“yolo11n.pt”) # Initialize Video Writer fourcc = cv2.VideoWriter_fourcc(*”MP4V”) video_writer = cv2.VideoWriter(“output.mp4”, fourcc, 5, (640, 360)) Step 3: Frame-by-Frame Inference # Frame-by-Frame Inference frame_folder = “frames” for frame_name in sorted(os.listdir(frame_folder)): frame_path = os.path.join(frame_folder, frame_name) frame = cv2.imread(frame_path) results = model.track(frame, persist=True, conf=0.1, tracker=”bytetrack.yaml”) boxes = results[0].boxes.xywh.cpu() track_ids = results[0].boxes.id.int().cpu().tolist() class_ids = results[0].boxes.cls.int().cpu().tolist() class_names = [results[0].names[cid] for cid in class_ids] for box, tid, cls in zip(boxes, track_ids, class_names): x, y, w, h = box x1, y1 = int(x – w / 2), int(y – h / 2) x2, y2 = int(x + w / 2), int(y + h / 2) cv2.rectangle(frame, (x1, y1), (x2, y2), (0, 255, 0), 2) draw_text(frame, f”ID:{tid} {cls}”, pos=(x1, y1 – 20)) video_writer.write(frame) video_writer.release() Quantitative Evaluation Model Variant FPS mAP@50 Track Recall Track Precision YOLOv11n + ByteTrack 110 70.2% 81.5% 84.3% YOLOv11m + ByteTrack 55 76.9% 88.0% 89.1% YOLOv11l + ByteTrack 30 79.3% 89.2% 90.5% Tested on MOT17 benchmark (720p), using a single NVIDIA RTX 3080 GPU. ByteTrack Configuration File tracker_type: bytetrack track_high_thresh: 0.25 track_low_thresh: 0.1 new_track_thresh: 0.25 track_buffer: 30 match_thresh: 0.8 fuse_score: True Conclusion The integration of YOLOv11 with ByteTrack constitutes a highly effective, real-time tracking system capable of handling occlusion, partial detection, and dynamic scene transitions. The methodological innovations in ByteTrack—particularly its dual-stage association pipeline—elevate it above prior approaches in both empirical performance and practical resilience. Key Contributions: Robust re-identification via deferred low-confidence matching Exceptional frame-rate throughput suitable for real-time applications Seamless deployment using the Ultralytics API Visit Our Data Annotation Service Visit Now

Introduction Edge AI integrates artificial intelligence (AI) capabilities directly into edge devices, allowing data to be processed locally. This minimizes latency, reduces network traffic, and enhances privacy. YOLO (You Only Look Once), a cutting-edge real-time object detection model, enables devices to identify objects instantaneously, making it ideal for edge scenarios. Optimizing YOLO for Edge AI enhances real-time applications, crucial for systems where latency can severely impact performance, like autonomous vehicles, drones, smart surveillance, and IoT applications. This blog thoroughly examines methods to effectively optimize YOLO, ensuring efficient operation even on resource-constrained edge devices. Understanding YOLO and Edge AI YOLO operates by dividing an image into grids, predicting bounding boxes, and classifying detected objects simultaneously. This single-pass method dramatically boosts speed compared to traditional two-stage detection methods like R-CNN. However, running YOLO on edge devices presents challenges, such as limited computing resources, energy efficiency demands, and hardware constraints. Edge AI mitigates these issues by decentralizing data processing, yet it introduces constraints like limited memory, power, and processing capabilities, requiring specialized optimization methods to efficiently deploy robust AI models like YOLO. Successfully deploying YOLO at the edge involves balancing accuracy, speed, power consumption, and cost. YOLO Versions and Their Impact Different YOLO versions significantly impact performance characteristics on edge devices. YOLO v3 emphasizes balance and robustness, utilizing multi-scale predictions to enhance detection accuracy. YOLO v4 improves on these by integrating advanced training methods like Mish activation and Cross Stage Partial connections, enhancing accuracy without drastically affecting inference speed. YOLO v5 further optimizes deployment by reducing the model’s size and increasing inference speed, ideal for lightweight deployments on smaller hardware. YOLO v8 represents the latest advances, incorporating modern deep learning innovations for superior performance and efficiency. YOLO Version FPS (Jetson Nano) mAP (mean Average Precision) Size (MB) YOLO v3 25 33.0% 236 YOLO v4 28 43.5% 244 YOLO v5 32 46.5% 27 YOLO v8 35 49.0% 24 Selecting the appropriate YOLO version depends heavily on the application’s specific needs, balancing factors such as required accuracy, speed, memory footprint, and device capabilities. Hardware Considerations for Edge AI Hardware selection directly affects YOLO’s performance at the edge. Central Processing Units (CPUs) provide versatility and general compatibility but typically offer moderate inference speeds. Graphics Processing Units (GPUs), optimized for parallel computation, deliver higher speeds but consume significant power and require cooling solutions. Tensor Processing Units (TPUs), specialized for neural networks, provide even faster inference speeds with comparatively better power efficiency, yet their specialized nature often comes with higher costs and compatibility considerations. Neural Processing Units (NPUs), specifically designed for AI workloads, achieve optimal performance in terms of speed, efficiency, and energy consumption, often preferred for mobile and IoT applications. Hardware Type Inference Speed Power Consumption Cost CPU Moderate Low Low GPU High High Medium TPU Very High Medium High NPU Highest Low High Detailed benchmarking is essential when selecting hardware, taking into consideration not only raw performance metrics but also factors such as power budgets, thermal constraints, ease of integration, software compatibility, and total cost of ownership. Model Optimization Techniques Optimizing YOLO for edge deployment involves methods such as pruning, quantization, and knowledge distillation. Model pruning involves systematically reducing model complexity by removing unnecessary connections and layers without significantly affecting accuracy. Quantization reduces computational precision from floating-point (FP32) to lower bit-depth representations such as INT8, drastically reducing memory footprint and computational load, significantly boosting inference speed. Code Example (Quantization in PyTorch): import torch from torch.quantization import quantize_dynamic model_fp32 = torch.load(‘yolo.pth’) model_int8 = quantize_dynamic(model_fp32, {torch.nn.Linear}, dtype=torch.qint8) torch.save(model_int8, ‘yolo_quantized.pth’) Knowledge distillation involves training smaller, more efficient models (students) to replicate performance from larger models (teachers), preserving accuracy while significantly reducing computational overhead. Deployment Strategies for Edge Effective deployment involves leveraging technologies like Docker, TensorFlow Lite, and PyTorch Mobile, which simplify managing environments and model distribution across diverse edge devices. Docker containers standardize deployment environments, facilitating seamless updates and scalability. TensorFlow Lite provides a lightweight runtime optimized for edge devices, offering efficient execution of quantized models. Code Example (TensorFlow Lite): import tensorflow as tf converter = tf.lite.TFLiteConverter.from_saved_model(‘yolo_model’) tflite_model = converter.convert() with open(‘yolo_edge.tflite’, ‘wb’) as f: f.write(tflite_model) PyTorch Mobile similarly facilitates model deployment on mobile and edge devices, simplifying model serialization, reducing runtime overhead, and enabling efficient execution directly on-device without needing extensive computational resources. Advanced Techniques for Real-Time Performance Real-time performance requires advanced strategies like frame skipping, batching, and hardware acceleration. Frame skipping involves selectively processing frames based on relevance, significantly reducing computational load. Batching aggregates multiple data points for parallel inference, efficiently leveraging hardware capabilities. Code Example (Batch Inference): batch_size = 4 for i in range(0, len(images), batch_size): batch = images[i:i+batch_size] predictions = model(batch) Hardware acceleration uses specialized processors or instructions sets like CUDA for GPUs or dedicated NPU hardware instructions, maximizing computational throughput and minimizing latency. Case Studies Real-world applications highlight practical implementations of optimized YOLO. Smart surveillance systems utilize YOLO for real-time object detection to enhance security, identify threats instantly, and reduce response time. Autonomous drones deploy optimized YOLO for navigation, obstacle avoidance, and real-time decision-making, crucial for operational safety and effectiveness. Smart Surveillance System Example Each application underscores specific optimizations, hardware considerations, and deployment strategies, demonstrating the significant benefits achievable through careful optimization. Future Trends Emerging trends in Edge AI and YOLO include the integration of neuromorphic chips, federated learning, and novel deep learning techniques aimed at further reducing latency and enhancing inference capabilities. Neuromorphic chips simulate neural processes for highly efficient computing. Federated learning allows decentralized model training directly on edge devices, enhancing data privacy and efficiency. Future iterations of YOLO are expected to leverage these technologies to push boundaries further in real-time object detection performance. Conclusion Optimizing YOLO for Edge AI entails comprehensive approaches encompassing model selection, hardware optimization, deployment strategies, and advanced techniques. The continuous evolution in both hardware and software landscapes promises even more powerful, efficient, and practical edge AI applications. Visit Our Data Annotation Service Visit Now

Object detection has witnessed groundbreaking advancements over the past decade, with the YOLO (You Only Look Once) series consistently setting new benchmarks in real-time performance and accuracy. With the release of YOLOv11 and YOLOv12, we see the integration of novel architectural innovations aimed at improving efficiency, precision, and scalability. This in-depth comparison explores the key differences between YOLOv11 and YOLOv12, analyzing their technical advancements, performance metrics, and applications across industries. Evolution of the YOLO Series Since its inception in 2016, the YOLO series has evolved from a simple yet effective object detection framework to a highly sophisticated model that balances speed and accuracy. Over the years, each iteration has introduced enhancements in feature extraction, backbone architectures, attention mechanisms, and optimization techniques. YOLOv1 to YOLOv5 focused on refining CNN-based architectures and improving detection efficiency. YOLOv6 to YOLOv9 integrated advanced training techniques and lightweight structures for better deployment flexibility. YOLOv10 introduced transformer-based models and eliminated the need for Non-Maximum Suppression (NMS), further optimizing real-time detection. YOLOv11 and YOLOv12 build upon these improvements, integrating novel methodologies to push the boundaries of efficiency and precision. YOLOv11: Key Features and Advancements YOLOv11, released in late 2024, introduced several fundamental enhancements aimed at optimizing both detection speed and accuracy: 1. Transformer-Based Backbone One of the most notable improvements in YOLOv11 is the shift from a purely CNN-based architecture to a transformer-based backbone. This enhances the model’s capability to understand global spatial relationships, improving object detection for complex and overlapping objects. 2. Dynamic Head Design YOLOv11 incorporates a dynamic detection head, which adjusts processing power based on image complexity. This results in more efficient computational resource allocation and higher accuracy in challenging detection scenarios. 3. NMS-Free Training By eliminating Non-Maximum Suppression (NMS) during training, YOLOv11 improves inference speed while maintaining detection precision. 4. Dual Label Assignment To enhance detection for densely packed objects, YOLOv11 employs a dual label assignment strategy, utilizing both one-to-one and one-to-many label assignment techniques. 5. Partial Self-Attention (PSA) YOLOv11 selectively applies attention mechanisms to specific regions of the feature map, improving its global representation capabilities without increasing computational overhead. Performance Benchmarks Mean Average Precision (mAP):5% Inference Speed:60 FPS Parameter Count:~40 million YOLOv12: The Next Evolution in Object Detection YOLOv12, launched in early 2025, builds upon the innovations of YOLOv11 while introducing additional optimizations aimed at increasing efficiency. 1. Area Attention Module (A2) This module optimizes the use of attention mechanisms by dividing the feature map into specific areas, allowing for a large receptive field while maintaining computational efficiency. 2. Residual Efficient Layer Aggregation Networks (R-ELAN) R-ELAN enhances training stability by incorporating block-level residual connections, improving both convergence speed and model performance. 3. FlashAttention Integration YOLOv12 introduces FlashAttention, an optimized memory management technique that reduces access bottlenecks, enhancing the model’s inference efficiency. 4. Architectural Refinements Several structural refinements have been made, including: Removing positional encoding Adjusting the Multi-Layer Perceptron (MLP) ratio Reducing block depth Increasing the use of convolution operations for enhanced computational efficiency Performance Benchmarks Mean Average Precision (mAP):6% Inference Latency:64 ms (on T4 GPU) Efficiency:Outperforms YOLOv10-N and YOLOv11-N in speed-to-accuracy ratio YOLOv11 vs. YOLOv12: A Direct Comparison Feature YOLOv11 YOLOv12 Backbone Transformer-based Optimized hybrid with Area Attention Detection Head Dynamic adaptation FlashAttention-enhanced processing Training Method NMS-free training Efficient label assignment techniques Optimization Techniques Partial Self-Attention R-ELAN with memory optimization mAP 61.5% 40.6% Inference Speed 60 FPS 1.64 ms latency (T4 GPU) Computational Efficiency High Higher Applications Across Industries Both YOLOv11 and YOLOv12 serve a wide range of real-world applications, enabling advancements in various fields: 1. Autonomous Vehicles Improved real-time object detection enhances safety and navigation in self-driving cars, allowing for better lane detection, pedestrian recognition, and obstacle avoidance. 2. Healthcare and Medical Imaging The ability to detect anomalies with high precision accelerates medical diagnosis and treatment planning, especially in radiology and pathology. 3. Retail and Inventory Management Automated product tracking and inventory monitoring reduce operational costs and improve stock management efficiency. 4. Surveillance and Security Advanced threat detection capabilities make these models ideal for intelligent video surveillance and crowd monitoring. 5. Robotics and Industrial Automation Enhanced perception capabilities empower robots to perform complex tasks with greater autonomy and precision. Future Directions in YOLO Development As object detection continues to evolve, several promising research areas could shape the next iterations of YOLO: Enhanced Hardware Optimization:Adapting models for edge devices and mobile deployment. Expanded Task Applications:Adapting YOLO for applications beyond object detection, such as pose estimation and instance segmentation. Advanced Training Methodologies:Integrating self-supervised and semi-supervised learning techniques to improve generalization and reduce data dependency. Conclusion Both YOLOv11 and YOLOv12 represent significant milestones in the evolution of real-time object detection. While YOLOv11 excels in accuracy with its transformer-based backbone, YOLOv12 pushes the boundaries of computational efficiency through innovative attention mechanisms and optimized processing techniques. The choice between these models ultimately depends on the specific application requirements—whether prioritizing accuracy (YOLOv11) or speed and efficiency (YOLOv12). As research continues, the future of YOLO promises even more groundbreaking advancements in deep learning and computer vision. Visit Our Data Annotation Service Visit Now
Training a deep learning model for object detection requires a blend of efficient tools, robust datasets, and an understanding of hyperparameters. Ultralytics’ YOLO (You Only Look Once) series has emerged as a favorite in the machine learning community, offering a streamlined approach to object detection tasks. This blog serves as a complete guide to training YOLO models with Ultralytics, diving deeper into its functionalities, features, and use cases. Introduction to YOLO Model Training YOLO models have revolutionized real-time object detection with their speed and accuracy. Unlike traditional methods that require multiple stages for detecting and classifying objects, YOLO performs both tasks in a single forward pass. This makes it a game-changer for applications demanding high-speed object detection, such as autonomous vehicles, surveillance systems, and augmented reality. The latest iterations, including Ultralytics YOLOv11, are optimized for both versatility and efficiency. These models introduce advanced features, such as multi-scale detection and enhanced augmentation techniques, enabling superior performance across diverse datasets and tasks. Whether you’re a seasoned data scientist or a beginner looking to train your first model, YOLO’s training mode is designed to meet your needs. Training involves feeding annotated datasets into the model and optimizing parameters to enhance performance. With Ultralytics YOLO, you can train on a variety of datasets—from widely available ones like COCO and ImageNet to your custom datasets tailored to niche applications. Key benefits of YOLO’s training mode include: High Efficiency: Seamless GPU utilization, whether on single or multi-GPU setups. Flexibility: Train with hyperparameters tailored to your dataset and goals. Ease of Use: Intuitive CLI and Python APIs simplify the training workflow. By leveraging these benefits, users can build models capable of detecting and classifying objects with remarkable speed and precision. Key Features of YOLO Training Mode Ultralytics YOLO’s training mode comes packed with features that streamline the training process: 1. Automatic Dataset Management YOLO can automatically download and configure popular datasets like COCO, VOC, and ImageNet on first use. This eliminates the hassle of manual setup. 2. Multi-GPU SupportHarness the power of multiple GPUs to accelerate training. Simply specify the GPU IDs to distribute the workload efficiently. 3. Hyperparameter ConfigurationFine-tune performance with an extensive range of customizable hyperparameters, such as learning rate, momentum, and weight decay. These parameters can be adjusted via YAML files or CLI commands. 4. Real-Time MonitoringVisualize training metrics, loss functions, and other performance indicators in real-time. This allows for better insights into the model’s learning process. 5. Apple SiliconOptimization Ultralytics YOLO supports training on Apple silicon devices (e.g., M1, M2 chips) via the Metal Performance Shaders (MPS) framework, ensuring efficiency across diverse hardware platforms. 6. Resume TrainingInterrupted training sessions can be resumed seamlessly, loading previous weights, optimizer states, and epoch numbers. This feature is particularly valuable for long training runs or when experiments require incremental updates. Preparing for YOLO Model Training Successful model training starts with proper preparation. Below are detailed steps to set up your YOLO environment:1. YOLO Installation:Begin by installing the Ultralytics YOLO package. It is highly recommended to use a virtual environment to avoid conflicts with other libraries. Installation can be done using pip: pip install ultralytics After installation, ensure that the dependencies, such as PyTorch, are correctly set up. 2. Dataset Preparation:The quality and structure of your dataset play a pivotal role in training. YOLO supports both standard datasets like COCO and custom datasets. For custom datasets, ensure that annotations are in YOLO format, specifying bounding box coordinates and corresponding class labels. Tools like LabelImg can assist in creating annotations. 3. Hardware Setup:YOLO training can be resource-intensive. While it supports CPUs, training on GPUs or Apple silicon chips significantly accelerates the process. Ensure that your hardware is configured with the necessary drivers, such as CUDA for NVIDIA GPUs or Metal for macOS devices. Usage Examples for YOLO Training Practical examples help bridge the gap between theory and application. Here’s how you can use YOLO for different training scenarios: Basic Training ExampleTrain a YOLOv11 model on the COCO8 dataset for 100 epochs with an image size of 640: from ultralytics import YOLO # Load a pretrained model model = YOLO("yolo11n.pt") # Train the model results = model.train(data="coco8.yaml", epochs=100, imgsz=640) Alternatively, use the CLI for a quick command-line approach: yolo train data=coco8.yaml epochs=100 imgsz=640 Multi-GPU Training For setups with multiple GPUs, specify the devices to distribute the workload. This is ideal for training on large datasets: from ultralytics import YOLO # Load the model model = YOLO("yolo11n.pt") # Train with two GPUs results = model.train(data="coco8.yaml", epochs=100, imgsz=640, device=[0, 1]) Training on Apple Silicon With macOS devices gaining popularity, YOLO supports training on Apple’s silicon chips using MPS. Here’s an example: from ultralytics import YOLO # Load the model model = YOLO("yolo11n.pt") # Train with MPS results = model.train(data="coco8.yaml", epochs=100, imgsz=640, device="mps") Resume Interrupted Training When training is interrupted, you can resume it using a saved checkpoint. This saves resources and avoids starting from scratch: from ultralytics import YOLO # Load the partially trained model model = YOLO("path/to/last.pt") # Resume training results = model.train(resume=True) Full Project: End-to-End YOLO Training Example To illustrate the process of training a YOLO model, let’s walk through an end-to-end project: 1. Project Overview In this project, we will train a YOLO model to detect vehicles in traffic images. The dataset consists of annotated images with bounding boxes for cars, trucks, and motorcycles. 2. Step-by-Step Workflow Dataset Preparation: Download the dataset containing traffic images. Use annotation tools like LabelImg to label objects in the images and save the labels in YOLO format. Organize the dataset into train, val, and test directories. Example directory structure: dataset/ ├── train/ │ ├── images/ │ ├── labels/ ├── val/ │ ├── images/ │ ├── labels/ ├── test/ │ ├── images/ │ ├── labels/ 2. Environment Setup: Install YOLO using pip: pip install ultralytics Verify that GPU or MPS acceleration is configured properly. 3. Model Configuration: Choose a YOLO model architecture, such as yolo11n.yaml for a lightweight model or yolo11x.yaml for a more robust model. Create a custom dataset configuration file (e.g.,
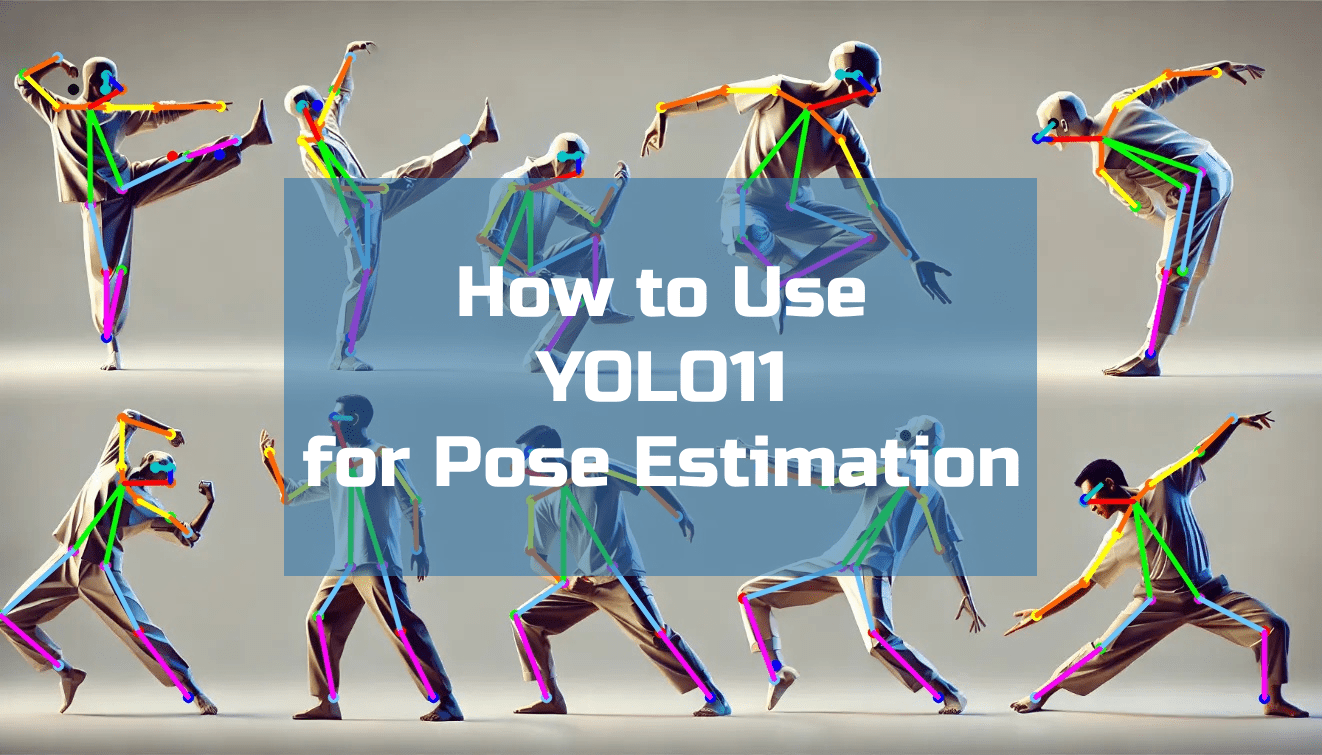
Pose estimation is a vital task in computer vision that involves detecting the positions and orientations of key points on a human or object. Applications span a wide range of fields, including sports analysis, healthcare, and animation. YOLO (You Only Look Once) models have revolutionized object detection with their speed and accuracy. With YOLOv11, pose estimation capabilities are seamlessly integrated, offering a unified solution for detecting objects and their poses. This comprehensive guide explores how to use YOLOv11 for pose estimation. Whether you’re developing a fitness tracking app or analyzing biomechanics, this guide equips you with the tools and knowledge to leverage YOLOv11 effectively. Understanding Pose Estimation What is Pose Estimation? Pose estimation predicts the spatial coordinates of key points in an object or person, such as joints in a human body or key features in machinery. These coordinates form a “skeleton” representing the pose. Key Elements: Keypoints: Specific points like elbows, knees, or object edges. Skeleton: A connection of keypoints to form a meaningful structure. Applications of Pose Estimation: Sports Analytics: Tracking athletes’ movements to improve performance. Healthcare: Monitoring patients’ postures for rehabilitation. Gaming and AR/VR: Powering motion tracking for immersive experiences. Robotics: Assisting robots in understanding human actions. YOLOv11 and Pose Estimation YOLOv11 enhances pose estimation with advanced architecture, combining the efficiency of YOLO with the precision of keypoint detection. Key Features of YOLOv11 for Pose Estimation: Transformer-Based Backbone: Improved feature extraction for better keypoint localization. Anchor-Free Detection: Enhances keypoint prediction for objects of varying scales. Multi-Task Learning: Supports simultaneous object detection and pose estimation. Comparison with Other Pose Estimation Models: Feature YOLOv11 OpenPose HRNet Speed Real-time Slower Moderate Accuracy High Very High Very High Scalability Excellent Limited Moderate Deployment Optimized for edge Requires high-end GPUs Requires high-end GPUs Setting Up YOLOv11 for Pose Estimation System Requirements: To use YOLOv11 for pose estimation, ensure your system meets the following specifications: Hardware: GPU with at least 8GB VRAM (NVIDIA recommended). 16GB RAM or higher. SSD for faster data access. Software: Python 3.8+. PyTorch or TensorFlow. CUDA and cuDNN for GPU acceleration. Installation Process: Clone the YOLOv11 repository: git clone https://github.com/your-repo/yolov11.git cd yolov11 2. Install Dependencies: Create a virtual environment and install the required packages: pip install -r requirements.txt 3. Verify Installation:Run a test script to ensure YOLOv11 is installed correctly: python test_installation.py Downloading Pretrained Models and Datasets Download YOLOv11 models trained for pose estimation: wget https://path-to-weights/yolov11-pose.pt Understanding YOLOv11 Configuration for Pose Estimation Configuring YOLOv11 for Keypoint Detection: The configuration file (yolov11-pose.yaml) includes details about: Keypoints: The number of keypoints to detect. Connections: Define how keypoints are linked to form skeletons. Architecture: Specify layers for keypoint prediction. Dataset Preparation for Pose Estimation: Prepare data in COCO format: Annotations: Include keypoint coordinates and visibility flags. Folder Structure: data/ train/ val/ annotations/ train.json val.json Hyperparameter Adjustments: Fine-tune parameters in the configuration file: Learning Rate (lr0): Initial learning rate for training. Batch Size (batch_size): Adjust based on GPU memory. Epochs (epochs): Number of training iterations. Training YOLOv11 for Pose Estimation Fine-Tuning on Custom Datasets: Adapt YOLOv11 to your dataset by running: python train.py –cfg yolov11-pose.yaml –data pose_dataset.yaml –weights yolov11-pose.pt –epochs 100 Transfer Learning for Pose Estimation: Use pretrained weights to speed up training: python train.py –weights yolov11-pretrained.pt –data pose_dataset.yaml –freeze-layers Monitoring Training and Performance: mAP: Mean Average Precision for pose estimation. Loss Curves: Monitor classification, bounding box, and keypoint losses. Running Inference with YOLOv11 Pose Estimation on Single Images: python detect.py –weights yolov11-pose.pt –img path/to/image.jpg –task pose Batch Processing and Video Inference: Process an entire dataset or video file: python detect.py –weights yolov11-pose.pt –source path/to/video.mp4 –task pose Real-Time Pose Estimation: Use a webcam for real-time inference: python detect.py –weights yolov11-pose.pt –source 0 –task pose Optimizing YOLOv11 for Pose Estimation Optimization plays a critical role in enhancing YOLOv11’s performance for pose estimation. Whether your goal is to achieve higher accuracy, faster inference, or seamless deployment on edge devices, these techniques can make a significant difference. Improving Accuracy Data Augmentation Augment your dataset to increase diversity and reduce overfitting: Random Rotation: Adds robustness to rotations by mimicking real-world variations. Scaling: Allows the model to detect keypoints in objects of varying sizes. Cropping and Padding: Simulates occlusions and incomplete views. Example using Albumentations for augmentation: import albumentations as A transform = A.Compose([ A.Rotate(limit=20, p=0.5), A.HorizontalFlip(p=0.5), A.RandomBrightnessContrast(p=0.2), A.Resize(640, 640) ]) 2. Hyperparameter Tuning Adjust parameters to fine-tune performance: Learning Rate: Start with lr0=0.01 and decay gradually. Batch Size: Use smaller batches if GPU memory is limited but increase epochs. Epochs: Train for longer durations if overfitting is not an issue. Use tools like Optuna for automated hyperparameter optimization: import optuna def objective(trial): lr = trial.suggest_loguniform(‘lr’, 1e-5, 1e-1) batch_size = trial.suggest_int(‘batch_size’, 16, 64) # Implement the training logic with the selected parameters 3. Pretraining and Transfer Learning Start with YOLOv11 pretrained on large datasets like COCO. Fine-tune with domain-specific datasets to enhance accuracy in niche applications. 4. Loss Function Improvements Modify loss functions to emphasize keypoint precision: Combine Mean Squared Error (MSE) for keypoints with Cross-Entropy Loss for classification. Reducing Computational Overhead Pruning Remove redundant weights and layers to reduce model size without significantly impacting accuracy: from torch.nn.utils import prune prune.l1_unstructured(model.layer, name=’weight’, amount=0.2) 2. Quantization Convert model weights from FP32 to INT8 or FP16 to accelerate inference: quantized_model = torch.quantization.quantize_dynamic( model, {torch.nn.Linear}, dtype=torch.qint8 ) 3. Dynamic Resolution Scaling Use adaptive resolution scaling to reduce computation for smaller objects while maintaining accuracy. 4. Model Compression Compress the model using techniques like knowledge distillation, transferring knowledge from a large model to a smaller one. Deployment on Edge Devices Model Conversion Export the YOLOv11 model to ONNX or TensorRT for deployment: python export.py –weights yolov11-pose.pt –img 640 –batch-size 1 2. Device Optimization Deploy on devices like NVIDIA Jetson Nano, Coral TPU, or Raspberry Pi: Use TensorRT for NVIDIA devices. Use Edge TPU compiler for Coral devices. 3. Power Efficiency Enable hardware acceleration for low-power consumption: NVIDIA Jetson offers nvpmodel to optimize power usage. 4. Streamlined Inference Implement real-time pose estimation using lightweight frameworks like Flask or FastAPI for API-based applications.

Image classification is a fundamental task in computer vision that assigns labels to images based on their content. From recognizing animals in photographs to identifying defective parts in manufacturing, image classification powers a wide range of applications across industries. While YOLO (You Only Look Once) is traditionally known for object detection, its versatile architecture can be adapted for image classification. YOLOv11, the latest iteration, incorporates state-of-the-art advancements that make it suitable not only for detecting objects but also for accurately classifying images. In this comprehensive guide, we explore how to leverage YOLOv11 for image classification. Whether you’re working on a personal project or deploying a large-scale classification system, this blog will provide you with everything you need to get started and excel with YOLOv11. What is Image Classification? Image classification is the task of analyzing an image and assigning it to one or more predefined categories. Unlike object detection, which identifies multiple objects within an image, classification focuses on the image as a whole. Key Principles of Image Classification Feature Extraction: Identifying key patterns or features in the image. Label Prediction: Mapping extracted features to one of the predefined labels. Applications of Image Classification Healthcare: Diagnosing diseases from medical scans. Retail: Categorizing products for inventory management. Autonomous Vehicles: Recognizing traffic signs and signals. Content Moderation: Identifying inappropriate content on social media. YOLOv11 and Image Classification YOLOv11 extends its capabilities beyond object detection to offer robust image classification features. Its powerful backbone architecture and efficient design make it a competitive choice for classification tasks. Key Features of YOLOv11 for Classification Transformer-Based Backbone: Enhanced feature extraction for high classification accuracy. Dynamic Feature Scaling: Efficiently handles images of varying resolutions. Multi-Task Learning Support: Allows simultaneous training for classification and other tasks. Advantages of YOLOv11 for Classification Speed: Real-time inference, even on large datasets. Accuracy: State-of-the-art performance on classification benchmarks. Scalability: Adaptable to edge devices and large-scale systems. Comparison to Traditional Classification Models Feature YOLOv11 Traditional Models Speed Real-time Often slower Versatility Multi-task capabilities Focused on single tasks Deployment Optimized for edge devices Heavy computational requirements Setting Up YOLOv11 for Image Classification System Requirements To use YOLOv11 effectively for image classification, ensure your system meets the following requirements: Hardware: A powerful GPU with at least 8GB VRAM (NVIDIA RTX series preferred). 16GB RAM or higher. SSD storage for faster dataset loading. Software: Python 3.8 or higher. PyTorch 2.0+ (or TensorFlow for alternative implementations). CUDA Toolkit and cuDNN for GPU acceleration. Installation Steps Clone the YOLOv11 Repository: git clone https://github.com/your-repo/yolov11.git cd yolov11 2. Install Dependencies: Create a virtual environment and install the required packages: pip install -r requirements.txt 3. Verify Installation:Run a test script to ensure YOLOv11 is installed correctly: python test_installation.py Downloading Pretrained Models and Datasets Pretrained models are available for download: wget https://path-to-weights/yolov11-classification.pt Use open datasets like ImageNet or CIFAR-10 for practice or real-world datasets for specific applications. Understanding YOLOv11 Configuration for Classification Configuring the Model Architecture YOLOv11’s architecture can be modified for classification by adjusting the output layers. Key configuration files include: Model Configuration (yolov11-classification.yaml): Specifies the number of classes and architecture details: nc: 1000 # Number of classes (e.g., ImageNet has 1000) depth_multiple: 1.0 width_multiple: 1.0 Dataset Configuration (dataset.yaml): Defines dataset paths and label names: train: data/train_images/ val: data/val_images/ nc: 1000 names: [‘class1’, ‘class2’, ‘class3’, …] Dataset Preparation and Annotation Formats Ensure the dataset is organized as follows: Folder Structure: data/ train/ class1/ class2/ val/ class1/ class2/ Labels: Each folder represents a class. Key Hyperparameters for Classification Adjust hyperparameters in hyp.yaml for optimal performance: Learning Rate (lr0): Initial learning rate. Batch Size (batch_size): Number of images per batch. Epochs (epochs): Total training iterations. Training YOLOv11 for Image Classification Fine-Tuning on Custom Datasets Fine-tuning leverages pretrained weights to adapt YOLOv11 for new classification tasks: python train.py –cfg yolov11-classification.yaml –data dataset.yaml –weights yolov11-pretrained.pt –epochs 50 Transfer Learning Transfer learning speeds up training by reusing knowledge from pretrained models: python train.py –weights yolov11-pretrained.pt –data dataset.yaml –freeze-layers Monitoring the Training Process Track metrics such as: Accuracy: Percentage of correct predictions. Loss: The difference between predicted and actual labels. Use tools like TensorBoard or W&B for visualization. Running Inference with YOLOv11 Image Classification on Single Images python classify.py –weights yolov11-classification.pt –img path/to/image.jpg Batch Inference for Datasets python classify.py –weights yolov11-classification.pt –source path/to/dataset/ Real-Time Classification python classify.py –weights yolov11-classification.pt –source 0 Optimizing YOLOv11 for Classification Optimization ensures that YOLOv11 runs efficiently and delivers high accuracy, whether deployed in large-scale systems or on resource-constrained devices. Techniques for Improving Classification Accuracy Data Augmentation: Apply transformations like flipping, rotation, scaling, and color jittering to increase dataset diversity. Example using Albumentations: import albumentations as A transform = A.Compose([ A.HorizontalFlip(p=0.5), A.RandomBrightnessContrast(p=0.2), A.Rotate(limit=15, p=0.5), ]) 2. Class Balancing: Address class imbalance by oversampling underrepresented classes or using weighted loss functions. 3. Learning Rate Scheduling: Implement learning rate decay to stabilize training: lr0: 0.01 lrf: 0.0001 # Final learning rate 4. Hyperparameter Tuning: Use grid search or Bayesian optimization tools to find optimal values for hyperparameters like batch size, learning rate, and momentum. 5. Regularization: Apply dropout or L2 regularization to prevent overfitting. Model Pruning and Quantization Pruning: Remove redundant layers to reduce model complexity. Use PyTorch’s pruning utilities: from torch.nn.utils import prune prune.l1_unstructured(model.layer, name="weight", amount=0.3) Quantization: Convert weights to lower precision (e.g., FP16 or INT8) to reduce memory usage and speed up inference. Example using PyTorch: quantized_model = torch.quantization.quantize_dynamic( model, {torch.nn.Linear}, dtype=torch.qint8 ) Benchmark Performance: Test optimized models for speed and accuracy using benchmarking tools. Deploying YOLOv11 on Edge Devices YOLOv11’s lightweight design makes it suitable for edge deployment on devices like Raspberry Pi, NVIDIA Jetson Nano, or Coral TPU. Convert to ONNX or TensorRT: Export the model: quantized_model = torch.quantization.quantize_dynamic( model, {torch.nn.Linear}, dtype=torch.qint8 ) Optimize with TensorRT: trtexec –onnx=model.onnx –saveEngine=model.engine 2. Deploy on Edge Devices: Load the TensorRT or ONNX model on the device. Use Python or C++ APIs for inference. 3. Optimize for Low Power Consumption: Enable power-saving modes or use hardware acceleration features available on the device. Case Studies and Real-World Applications Case Study 1: Retail Product Classification A

Instance segmentation is a powerful technique in computer vision that not only identifies objects within an image but also delineates the precise boundaries of each object. This level of detail is crucial for applications in autonomous driving, medical imaging, and augmented reality, where understanding the exact shape and size of objects is vital. YOLOv11, the latest iteration of the YOLO (You Only Look Once) family, introduces groundbreaking capabilities for instance segmentation. By combining speed, accuracy, and efficient architecture, YOLOv11 empowers developers to perform instance segmentation in real-time applications, even on resource-constrained devices. In this comprehensive guide, we will explore everything you need to know about using YOLOv11 for instance segmentation. From setup and training to advanced fine-tuning and real-world applications, this blog is your one-stop resource for mastering YOLOv11 in instance segmentation. What is Instance Segmentation? Instance segmentation is the process of identifying and segmenting individual objects in an image, assigning each object a unique label and mask. It differs from other computer vision tasks: Object Detection: Identifies and localizes objects with bounding boxes but doesn’t provide detailed boundaries. Semantic Segmentation: Assigns a class label to each pixel, but doesn’t differentiate between instances of the same object class. Instance Segmentation: Combines the best of both worlds, identifying each object instance and its exact shape. Real-World Applications Autonomous Vehicles: Instance segmentation enables precise object localization, crucial for obstacle avoidance and path planning. Healthcare: Identifying and segmenting tumors, organs, or cells in medical scans for accurate diagnosis. Augmented Reality: Enhancing AR experiences by precisely segmenting objects for virtual overlays. Retail and Manufacturing: Segmenting products on shelves or identifying defects in manufacturing lines. YOLOv11 for Instance Segmentation YOLOv11 brings several advancements that make it ideal for instance segmentation tasks: Features of YOLOv11 Supporting Instance Segmentation Dynamic Mask Heads: YOLOv11 integrates a dynamic head architecture for generating high-quality segmentation masks with minimal computational overhead. Transformer-Based Backbones: These enhance feature extraction, enabling better segmentation performance for complex and cluttered scenes. Anchor-Free Design: Reduces the complexity of manual anchor tuning and improves segmentation accuracy for objects of varying scales. Innovations in YOLOv11 for Instance Segmentation Multi-Scale Mask Prediction: Allows YOLOv11 to handle objects of different sizes effectively. Improved Loss Functions: Tailored loss functions optimize both detection and mask quality, balancing precision and recall. Edge Device Optimization: YOLOv11’s lightweight architecture ensures it can perform instance segmentation in real-time, even on devices with limited computational power. Benchmark Performance YOLOv11 has set new benchmarks in the field, achieving higher mAP (mean Average Precision) scores on popular instance segmentation datasets such as COCO and Cityscapes, while maintaining real-time processing speeds. Setting Up YOLOv11 for Instance Segmentation System Requirements To ensure smooth operation of YOLOv11, the following hardware and software setup is recommended: Hardware: A powerful GPU with at least 8GB VRAM (NVIDIA RTX series preferred). 16GB RAM or higher. SSD storage for faster dataset loading. Software: Python 3.8 or higher. PyTorch 2.0+ (or TensorFlow for alternative implementations). CUDA Toolkit and cuDNN for GPU acceleration. Installation Steps Clone the YOLOv11 Repository: git clone https://github.com/your-repo/yolov11.git cd yolov11 2. Install Dependencies: Create a virtual environment and install the required packages: pip install -r requirements.txt 3. Verify Installation:Run a test script to ensure YOLOv11 is installed correctly: python test_installation.py Prerequisites Before diving into instance segmentation, ensure familiarity with: Basic Python programming. Dataset preparation and annotation. Machine learning concepts, including training and validation. Understanding YOLOv11 Configuration Configuration Files for Instance Segmentation YOLOv11 uses configuration files to manage various settings for instance segmentation. These files define the model architecture, dataset paths, and hyperparameters. Let’s break down the critical sections: Model Configuration (yolov11.yaml): Specifies the backbone architecture, number of classes, and segmentation head parameters. Example: nc: 80 # Number of classes depth_multiple: 1.0 width_multiple: 1.0 segmentation_head: True Dataset Configuration (dataset.yaml): Defines paths to training, validation, and testing datasets. Example: train: data/train_images/ val: data/val_images/ test: data/test_images/ nc: 80 names: [‘person’, ‘car’, ‘cat’, …] Hyperparameter Configuration (hyp.yaml): Controls training parameters such as learning rate, batch size, and optimizer settings. Example: lr0: 0.01 # Initial learning rate momentum: 0.937 weight_decay: 0.0005 batch_size: 16 Dataset Preparation and Annotation Formats YOLOv11 supports popular annotation formats, including COCO and Pascal VOC. For instance segmentation, the COCO format is often preferred due to its detailed mask annotations. COCO Format: Requires an annotations.json file that includes: image_id: Identifier for each image. category_id: Class label for each object. segmentation: Polygon points defining object masks. Tools like LabelMe, Roboflow, or COCO Annotator simplify the annotation process. Pascal VOC Format: Typically uses XML files for annotations. Not ideal for instance segmentation as it primarily supports bounding boxes. Hyperparameter Settings for Instance Segmentation Key hyperparameters for instance segmentation include: Image Size (img_size): Determines input resolution. Higher resolutions improve mask quality but increase computational cost. Batch Size (batch_size): Affects training stability. Use smaller sizes for high-resolution datasets. Learning Rate (lr0): The initial learning rate. A learning rate scheduler can dynamically adjust this. Training YOLOv11 for Instance Segmentation Using Pretrained Weights YOLOv11 provides pretrained weights trained on large datasets like COCO, which can be fine-tuned on custom instance segmentation tasks. Download the weights from the official repository or a trusted source: wget https://path-to-weights/yolov11-segmentation.pt Preparing Custom Datasets Organize Data: Divide your dataset into train, val, and test folders. Ensure the annotations.json file is in the COCO format. Validate Dataset Structure: Use validation scripts to verify annotation consistency: python validate_annotations.py –dataset data/train Training Process and Monitoring Run the training script with the appropriate configuration files: python train.py –cfg yolov11.yaml –data dataset.yaml –weights yolov11-segmentation.pt –epochs 50 –cfg: Path to the model configuration file. –data: Path to the dataset configuration file. –weights: Pretrained weights. –epochs: Number of training epochs. During training, monitor the following metrics: mAP (mean Average Precision): Evaluates overall performance. Loss: Includes classification, bounding box, and segmentation mask loss. Use tools like TensorBoard or W&B (Weights and Biases) for visualization. Running Inference with YOLOv11 Performing Instance Segmentation on Images After training, perform instance segmentation on an image: python detect.py –weights yolov11.pt –img 640 –source path/to/image.jpg –task segment –task segment enables instance segmentation.

Object detection is a cornerstone of computer vision, enabling machines to identify and locate objects within images and videos. It powers applications ranging from autonomous vehicles and surveillance systems to retail analytics and medical imaging. Over the years, numerous algorithms and models have been developed, but none have made as significant an impact as the YOLO (You Only Look Once) family of models. The YOLO series is renowned for its speed and accuracy, offering real-time object detection capabilities that have set benchmarks in the field. YOLOv11, the latest iteration, builds on its predecessors with groundbreaking advancements in architecture, precision, and efficiency. It introduces innovative features that address prior limitations and push the boundaries of what’s possible in object detection. This series is a comprehensive guide to using YOLOv11 for object detection. Whether you’re a beginner looking to understand the basics or an experienced practitioner aiming to master its advanced functionalities, this tutorial covers everything you need to know. By the end, you’ll be equipped to set up, train, and deploy YOLOv11 for various use cases, from simple projects to large-scale deployments. Understanding YOLOv11 Evolution of YOLO Models The journey of YOLO began with YOLOv1, introduced in 2016 by Joseph Redmon. Its key innovation was treating object detection as a regression problem, predicting bounding boxes and class probabilities directly from images in a single pass. Over time, subsequent versions—YOLOv2, YOLOv3, and so forth—improved accuracy, expanded support for multiple scales, and enhanced feature extraction capabilities. YOLOv11 represents the pinnacle of this evolution. It integrates advanced techniques such as transformer-based backbones, enhanced feature pyramid networks, and improved anchor-free mechanisms. These enhancements make YOLOv11 not only faster but also more robust in handling complex datasets and diverse environments. Key Advancements in YOLOv11 Improved Backbone Architecture: YOLOv11 employs a hybrid backbone combining convolutional and transformer layers, providing superior feature representation. Dynamic Head Design: The detection head adapts dynamically to different object scales, enhancing accuracy for small and overlapping objects. Better Anchoring: Anchor-free detection reduces the need for manual tuning, streamlining training and inference. Optimization for Edge Devices: YOLOv11 is optimized for deployment on resource-constrained devices, enabling efficient edge computing. Applications of YOLOv11 Autonomous Driving: Real-time detection of pedestrians, vehicles, and traffic signals. Healthcare: Identifying anomalies in medical images. Retail Analytics: Monitoring customer behavior and inventory tracking. Surveillance: Enhancing security through object detection in video feeds. Setting Up YOLOv11 System Requirements To achieve optimal performance with YOLOv11, ensure your system meets the following requirements: Hardware: GPU with at least 8GB VRAM (NVIDIA recommended). CPU with multiple cores for preprocessing tasks. Minimum 16GB RAM. Software: Python 3.8 or higher. CUDA Toolkit and cuDNN for GPU acceleration. PyTorch or TensorFlow (depending on the implementation). Installation Process Clone the Repository: git clone https://github.com/your-repo/yolov11.git cd yolov11 2. Install Dependencies: Create a virtual environment and install the required packages: pip install -r requirements.txt 3. Verify Installation:Run a test script to ensure YOLOv11 is installed correctly: python test_installation.py Prerequisites and Dependencies Familiarity with Python programming, basic machine learning concepts, and experience with tools like PyTorch or TensorFlow will help you get the most out of this guide. Getting Started with YOLOv11 Downloading Pretrained Models Pretrained YOLOv11 models are available for download from official repositories or community contributors. Choose the model variant (e.g., small, medium, large) based on your use case and computational resources. wget https://path-to-yolov11-model/yolov11-large.pt Understanding YOLOv11 Configuration Files Configuration files dictate the model’s architecture, dataset paths, and training parameters. Key sections include: Model Architecture: Defines the layers and connections. Dataset Paths: Specifies locations of training and validation datasets. Hyperparameters: Sets learning rates, batch sizes, and optimizer settings. Dataset Preparation YOLOv11 supports formats like COCO and Pascal VOC. Annotate your images using tools like LabelImg or Roboflow, and ensure the annotations are saved in the correct format. Training YOLOv11 Configuring Hyperparameters Customize the following parameters in the configuration file: Batch Size: Adjust based on GPU memory. Learning Rate: Use a scheduler for dynamic adjustment. Epochs: Set based on dataset size and complexity. Training on Custom Datasets Run the training script with your dataset: python train.py –cfg yolov11.yaml –data my_dataset.yaml –epochs 50 Using Transfer Learning Leverage pretrained weights to fine-tune YOLOv11 on your dataset, reducing training time: python train.py –weights yolov11-pretrained.pt –data my_dataset.yaml Inference with YOLOv11 Once your YOLOv11 model is trained, it’s time to put it to work by running inference on images, videos, or live camera feeds. Running Inference on Images To perform inference on a single image, use the inference script provided in the YOLOv11 repository: python detect.py –weights yolov11.pt –img 640 –source path/to/image.jpg –weights: Path to the trained YOLOv11 weights. –img: Input image size (e.g., 640×640). –source: Path to the image file. Running Inference on Videos To process video files, specify the video path as the source: python detect.py –weights yolov11.pt –img 640 –source path/to/video.mp4 The output will display the detected objects with bounding boxes, class labels, and confidence scores. Results can be saved by adding the –save-txt and –save-img flags. Real-Time Inference For live video feeds, such as from a webcam: python detect.py –weights yolov11.pt –source 0 Here, –source 0 specifies the default camera. Real-time inference requires high computational efficiency, and YOLOv11’s architecture ensures smooth performance on capable hardware. Optimizing Inference Speed If inference speed is a priority, consider these optimizations: Use a Smaller Model: Choose a lightweight YOLOv11 variant (e.g., YOLOv11-tiny). FP16 Precision: Enable mixed-precision inference for faster computations. python detect.py –weights yolov11.pt –img 640 –source path/to/image.jpg –half ONNX Conversion: Convert YOLOv11 to ONNX or TensorRT for deployment on specialized hardware. Advanced Topics Fine-Tuning and Model Optimization Fine-tuning YOLOv11 involves retraining on domain-specific datasets to improve accuracy. Adjusting hyperparameters such as learning rate decay and dropout rates can enhance the model’s generalization. Additionally, pruning and quantization techniques reduce model size and improve inference speed without significant loss in accuracy. Deployment on Edge Devices YOLOv11 is optimized for deployment on edge devices like NVIDIA Jetson Nano, Raspberry Pi, or Coral TPU. To deploy: Convert the trained model to ONNX: python export.py –weights yolov11.pt –img 640 –batch 1